Why on earth do you even put up with me?
On Monday, yes Monday, I said I would post this little tutorial the next day.
Well, 4 days later here I am.
I am nothing, if not completely and totally unreliable.
What can I say, It’s spring break week here. kids. enough said.
So on with my little pillow tutorial.
If you didn’t see this post on the swirled ruffle pillow, you might want to start there. It will give you the steps to make the actual pillow and how to make your ruffles.
This post will show you how to use your ruffles to make a completely different looking pillow. Ok, maybe not completely, it still is ruffled and made from a t-shirt. Movin’ on……
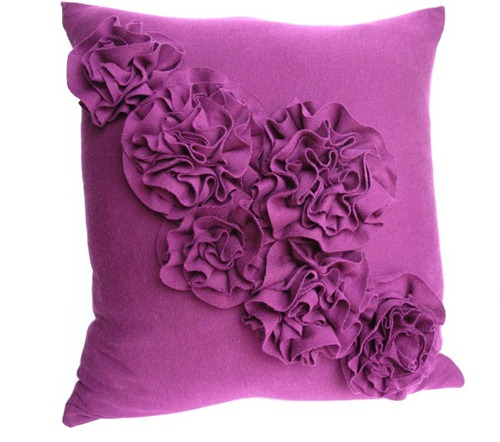
Here she is.
I {heart} her.
Just lovely.
You will start off by making your pillow cover and ruffles just like in this post, but without stitching any ruffles on it. Go ahead and sew the opening shut and you are ready to make some rosettes to place on your pillow.
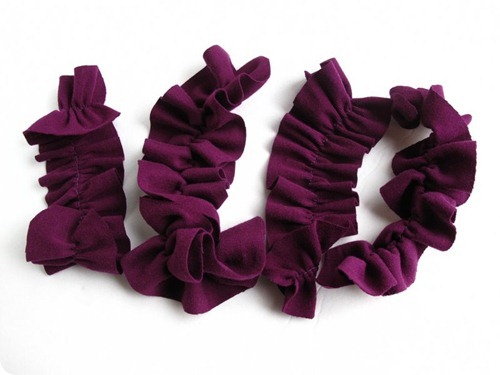 I made 4 big rosettes and 2 smaller ones. The larger ones take a couple strips of ruffle and the smaller ones only take one. So about 10 should do it. Keep in mind it will depend on the size of your pillow. Mine is only a 14” pillow so if yours is bigger, you might need more to make it look balanced.
 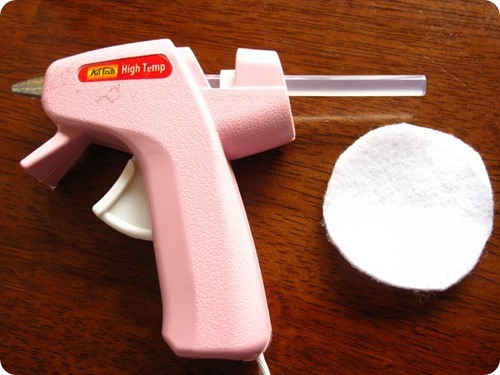 For each rosette you will need a circle of felt or fleece cut into about a 3” circle. It doesn’t need to be exact {or perfect} it will be hidden and any extra will be cut off. I used my high temp glue gun. I like the high temp because it adheres better and faster, but be careful or you might not have any finger prints left when you are done {not that I would know}.
 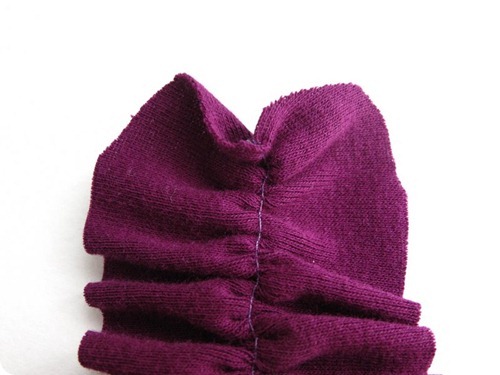 First I took each strip of ruffle and rounded off the corners at each end so it would have a softer look.
 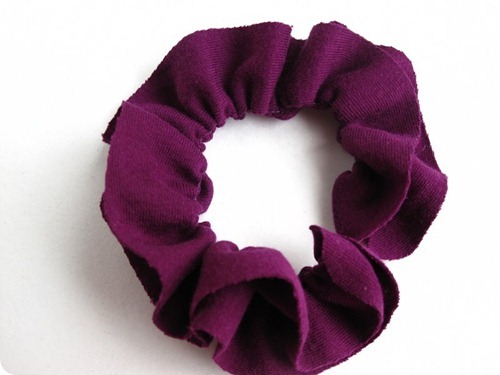 Take your first ruffle and fold it in half lengthwise with the stitching on one side, creating a V shape with the ruffle. The stitching side is the part you will be gluing down.
 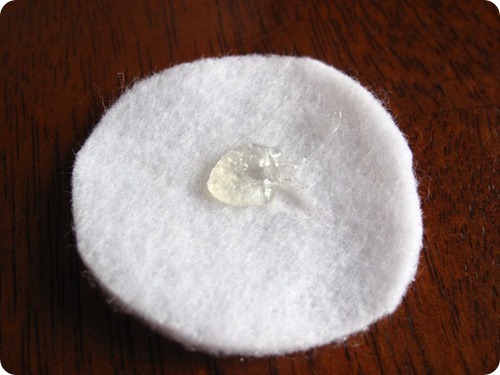 You will start with a dot of hot glue in the middle of your felt piece.
 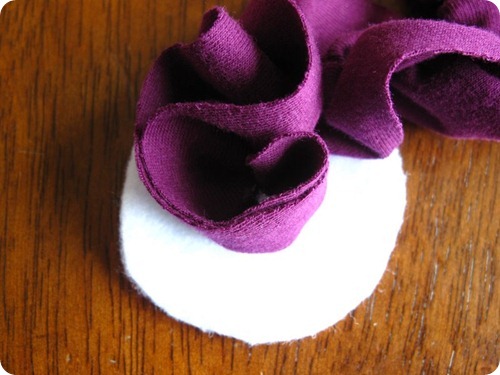 Grab the end of your first ruffle and kind of swirl it around the end to make the center of your rosette. I like to put my finger through the middle of the ruffle {the V part} and push the stitching part onto the glue.
 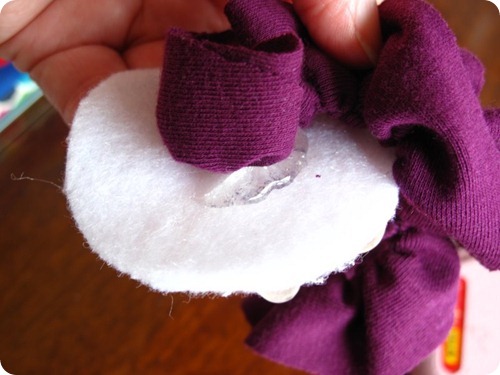 Once the center is adhered, make another short line of glue around the center part in the direction of your ruffle. {did that make any sense at all?}
 You will just keep going around in a circle with your glue and your ruffle, pushing it into the glue to adhere it. {this is way easier to do than to explain….promise}.
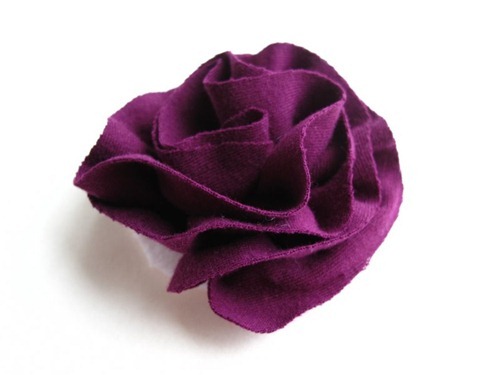 Here she is after one ruffle has been added. If this were one of the small rosettes I needed, I would take my scissors and cut around the bottom of the felt to remove any extra that wasn’t glued down and I would be finished.
 BUT, this is one of my big rosettes, so I am going to add one more ruffle to make it even bigger. I just start adding it where I left off with the other one.
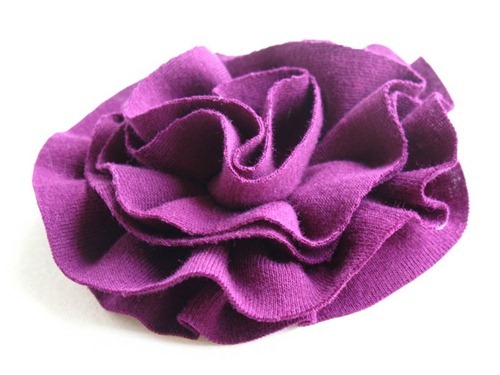
Here she is all finished and ready to apply to my pillow.
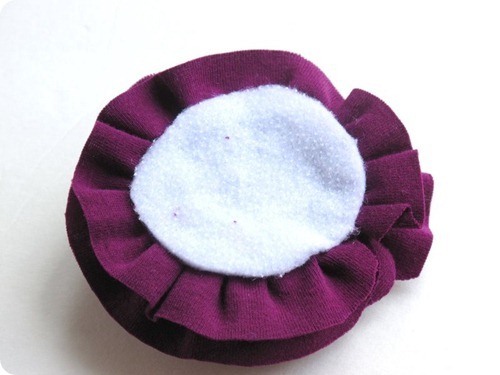
If there is still any bit of felt on the back side that hasn’t been glued, now would be the time to cut any of that extra off so you won’t be able to see it on the pillow.
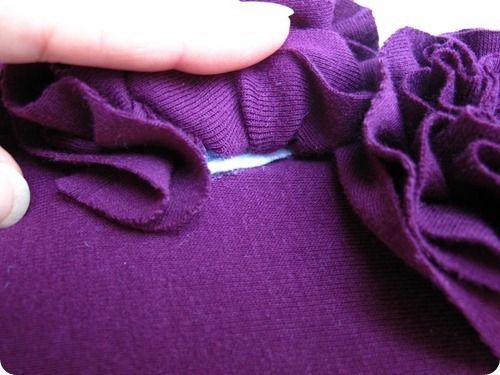 To adhere the rosettes to your pillow, simply lay them out in a design to your liking and hot glue each one to the pillow. Make sure you get plenty of glue around the edges so they don’t peel up. Nothin’ worse than peeling rosettes on your pillow.
 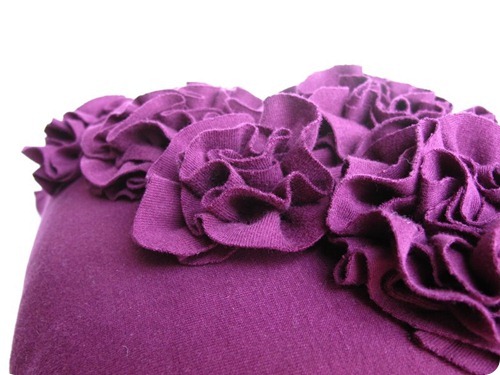 I actually thought this pillow was a lot easier to make than the other one. I love making the rosettes. You could use them in lots of different ways.
 Thanks for puttin’ up with me.
I am so thankful for each of you that comes to visit and leave comments.
You really do make my day!
Have a beautiful weekend!
This post is linked to: Weekend Wrap-up Party, Dittle Dattle, Mad Skills, Sew cute Tuesday, Take a look Tuesday , The Lettered Cottage








this is so lovely!
ReplyDeletethanks for sharing another great pillow!
im having a giveaway
abranconier.blogspot.com
This is absolutely adorable.
ReplyDeleteI too am having a giveaway for a shabby apple dress hop over andenter
This is just beautiful. I'm below you on Tatertots & Jello's party...BUT I really think I am going to attempt to make this!! I just adore all things ruffled & frilly!! Thank you so much for sharing!
ReplyDeleteI love the color and unlike a lot of decorative pillows I bet the t-shirt makes it really cozy. Great Idea! ~Merrilee
ReplyDeleteWhat a beautiful, unique pillow! Thanks for the tutorial. With your directions, it looks doable.
ReplyDeleteI'm here from Tatertots and Jello's party and am glad to have found your blog.
Have a great weekend.
Pam
I love the color and the ruffle. I haven't seen them done like this before.
ReplyDeleteI love this! Going to make one tomorrow! Thank you for the great tutorial!
ReplyDeletelove this!
ReplyDeleteTHAT is just toooo cute! If it were in a store I'd buy it! I'm SOOOOO going to try this! Thanks a ton for sharing it! I LOVE LOVE LOVE your blog SO SO much!!! Hugs! Julie
ReplyDeleteSo cute! I love it!
ReplyDeleteRachel @ Maybe Matilda
I saw your link at Tatertots and Jello and I love the finished pillow! I found three pillow forms in the closet this week (jackpot!) so I may try this soon.
ReplyDeleteI love this pillow!!! So very cute! I will definitely have to put this one on my very long to-do list!!!
ReplyDeleteThat is the prettiest ruffle pillow I've seen! Thanks so much for the tutorial.
ReplyDeleteWhat a pretty pillow, and great tutorial! I'd love for you to submit this to the M&T Spotlight at http://www.makeandtakes.com/spotlight
ReplyDeleteThis pillow is too cute and a great way to recycle old shirts! Thanks for sharing!
ReplyDeleteI love this sooo much!! great idea!! so cute.
ReplyDelete--Rebecca
www.mygirlishwhims.blogspot.com
Love this! Not to mention I have a new glue gun just *waiting* for a fun project like this. :-)
ReplyDeleteWhy do we "put up with" you? Because it is worth the wait! . . . and I love you!
ReplyDeleteAnita
Soo lovely... I love the color!
ReplyDeletehttp://thendralscraft.blogsopt.com
love, love, love it! I'm definitely going to try this - now to scour the house for an old tshirt :) Thanks for the great tute!
ReplyDeleteChristy
http://www.linbrylane.blogspot.com/
Alisa, I LOVE IT!! And I love the purple and I'm not usually a fan of it!
ReplyDeleteHi I am new to your blog and just LOVE it! Thanks for the tut on the roses and pillows, I will definitely be trying these! I will check back often I am sure !
ReplyDeleteAlex
http://www.youhadmeatcraft.com/
This is gorgeous!! I'd love for you to link up to Wow Me Wednesday!
ReplyDeletehttp://polkadotsonparade.blogspot.com/2011/03/wow-me-wednesday_23.html
Fun pillow Alisa ...
ReplyDeleteVery tempting one for me... I am felling in love with it... Thanks for sharing the idea... I am archiving your this project for my further inspiration...
If you love to play with colours and flowers? Please visit me at
http://craftaworld.blogspot.com/
Love
Farah
Super cute pillow and I love the colour. Thanks for the tut, it's fantastic.
ReplyDeleteMorven
I love this pillow!
ReplyDeleteI'll have to add this to my list of projects.
Thanks for the how to!
I heart her too!! Someday I will get the confidence and patience to try my hand at sewing. I'll be bookmarking this! New follower from blissimagesandbeyond, stop by and visit! :-)
ReplyDeleteLove! So going to make one for my daughter's bed.
ReplyDeleteIt's gorgeous, thanks for sharing!
ReplyDeleteWOW that looks great, I did something similar but it didn't turn out as lovely as yours! I'm kind of a newbie! :)
ReplyDeleteThanks for your tutorial!! :)
This looks so beautiful!! I would love to try making this! Your instructions are great!
ReplyDeleteHi, I featured your gorgeous pillow today on Finding fabulous!! LOVE IT so much. Love that you made it from a tee-shirt!
ReplyDeleteJane
FF
GORGEOUS!!!!! I couldn't take my eyes off it for a bit! I wish I could sew!!!!
ReplyDeletexoXOxo
Jenn @ Peas & Crayons
Oh my, I heart this pillow too! Those ruffled rosettes are so cute!
ReplyDelete~Tricia
soooooooooooooooo pretty!
ReplyDeleteI love this! I love this! I am going to pin this on my pinterest board and put it on my to do list! Thank you!
ReplyDeleteI love this! Great spring piece.
ReplyDeleteI love your sweet blog! :)
ReplyDeleteHow did you get the "ruffle" effect? Thanks!!
amber@mrsamberapple.com
Your pillows are great and now I know what to do with all my husband's unworn t-shirts!!!
ReplyDeleteThanks for your tutorial!
I love this pillow! I just saw this on craftgawker posted by someone else (not you). http://craftgawker.com/post/2011/09/15/24758/
ReplyDeleteI've pinned it to my pinterest board. Great tutorial on making the layered ruffle rosettes!
wow! this is so awesome! I just love this pillow! Plus, purple is a very elegant and beautiful color too! Just love this and is so easy to make...I hope you don't mind but I will share this on my facebook page. I include some crafts, parenting tips, cakes, recipes..its an all kinds of stuff page called ONE Place..farely new. Well, I just wanted to tell you how beautiful i thought it was not promote anything hehe. sorry about that. Good Job though..I certainly love other stuff you've done. I'm going to look at it right after this comment! Have a great day!
ReplyDeleteok one more thing, I barely read that u made this from a t shirt! wow..genius! Wonderful that u thought of sharing this..my email is missviridiana@yahoo.com ..awesome!
ReplyDeleteJust finished making one of these! Thanks so much for the tutorial. My daughter saw it on Pinterest and was in love with it. I think she will be surprised come Christmas morning. :) I made it 18x18, teal and it will match her Fandango quilt beautifully!
ReplyDeleteLove this!
ReplyDeleteThis is now on my (growing) to do list!!!
ReplyDeleteI LOVE this!!! I'm so glad I found this on Pinterest. I see lots of rosettes in my immediate future :D
ReplyDeleteThis is so so cool :-)
ReplyDeleteWow! This is awesome!!! I've been totally obsessed with "upcycling" my old t-shirts lately and I'm totes gonna have to try this one out! loooove it! :D
ReplyDelete-Abi
I love both the pillows! Excellent tutorials for making the ruffles! http://dontbuyathing.wordpress.com
ReplyDeletei love the ruffles. but how long should the strips be for large,middle & small flowers. vickieingram22@yahoo.com thank you
ReplyDeleteI love this pillow! Any chance you might put these in your Etsy shop?
ReplyDeleteBeautiful pillow. I featured it here:
ReplyDeletehttp://sewprettysewfree.blogspot.com/2013/03/flower-pillows-sewing-tutorials.html#
Anshu
I love it too - I hope i have sometimes time enough to do it myself.
ReplyDeleteRosa Lia
This is amazing and really simple..... Thanks for sharing.
ReplyDelete