
Steps1: Create New Custom SubmitForm.aspx page within Visiual studio and wirte down code withinSubmitForm.aspx.cs fileStep 2: Sign In by strong name key and Build ApplicationStep 3: Now Copy Dll in to Gac or respective bin folder of siteStep 4: Open Sharepoint site in sharepoint designerStep 5: Go to Lists folder and drag and drop SubmitForm.aspx and SubmitForm.aspx.cs file .Stpe6: Now Follow the steps to navigate Custom pagesSharePoint has a number of features when it comes to working with its built-in lists. One of these is that it automatically generates New (NewForm.aspx), Edit (EditForm.aspx) and Display (DispForm.aspx) for each list when it is created. While this is very useful, it is somewhat limited when you want to customize what is displayed, or how information is displayed on these pages.The answer to this problem is SharePoint Designer. In the following scenario, I will show you how to customize the NewForm.aspx page for a SharePoint List using SharePoint Designer.Your company wants to set up a Computer Equipment Request List to handle new requests that the employees have for the IT Department. So, you go and create the list in SharePoint. All is great until you realize that the majority of the information in the list is for internal IT use, and should not be presented to the end-user to fill out.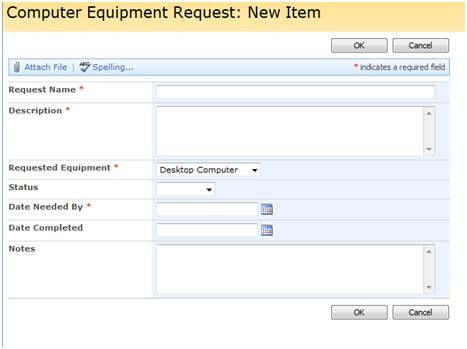 All you really want the end-user to complete is the fields, Request Name, Description, and Requested Equipment.This is where SharePoint Designer comes to the rescue. By completing these steps, you will be customizing your own NewForm.aspx in no time.1. Open SharePoint Designer.2. Open the Site where your list resides.3. In the Folder List window select the Computer Equipment Request list. 4. Right-click on the NewForm.aspx and select New From Existing Page. This creates a new page based on the original NewForm page. It is a bad idea to modify the default NewForm page, for if you need to revert back to the original, which could prove to be a difficult task. In some cases, this may require re-creating the list.
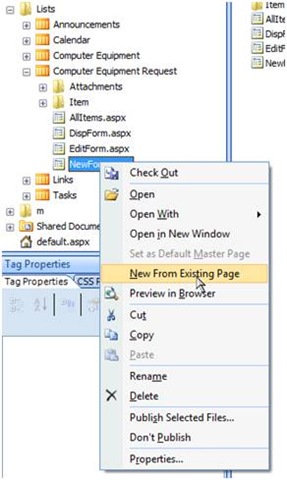 5. Now, in the main editor window, select the List placeholder and click on the
  (arrow) that appears in the upper-right corner. This will bring up the Common Content Tasks List, and then select Default to Master’s Content.
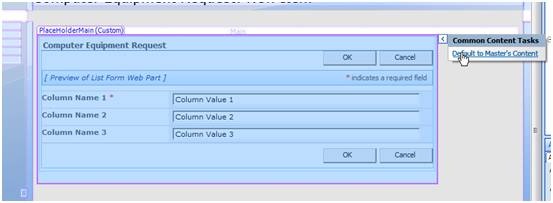 Click Yes on the message box that appears.
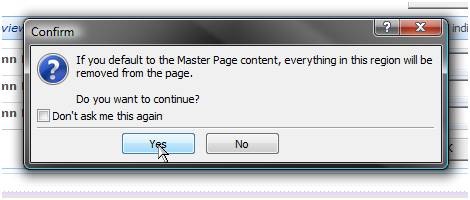 6. Then, you will want to select the PlaceHolderMain(Master) Content Place Holder, click on the
  that appears in the upper-right corner and select Create Custom Content.
 7. Next, click inside the PlaceHolderMain(Custom) and make sure that you can see the cursor inside the selected area.8. After this, in the SharePoint Designer File Menu, select Insert -> SharePoint Controls -> Custom List Form.
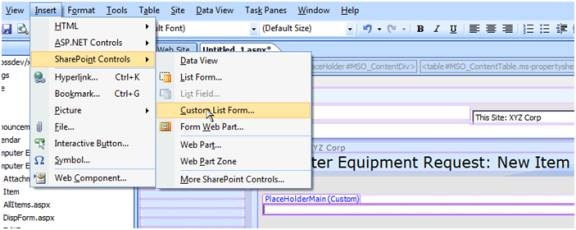 9. In the pop-up box that appears, select the Computer Equipment Request list, and make sure that Item is selected for “Content type to use for form”. You’ll also want to make sure that New item form is the selected option. As for the Show standard toolbar checkbox, this depends on how you will be using your custom List Form, but for this example, uncheck this checkbox.
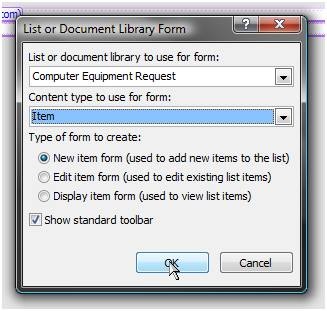 10. After this, in the main edit window, you will now see a custom list form control that can be customized as needed.11. For our custom New Form, we need to remove the extra fields that we do not want the end-users to fill out (or see). To do this, select somewhere in the field row that you want to remove (in this case, the Status field). Then right-click and select Delete -> Delete Rows. This will then remove that field row from the custom list form control. Repeat this step for all the fields you want to remove.
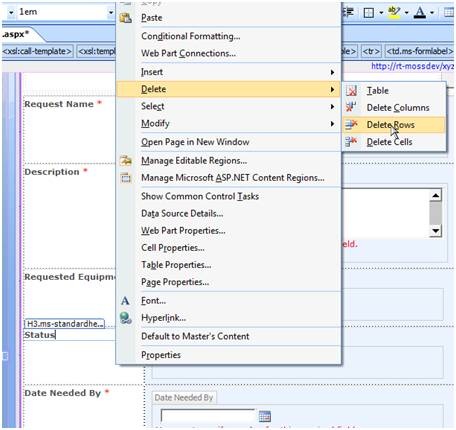 12. Once we have removed all fields we don’t want to be displayed, we are left with Request Name, Description, and Requested Equipment.
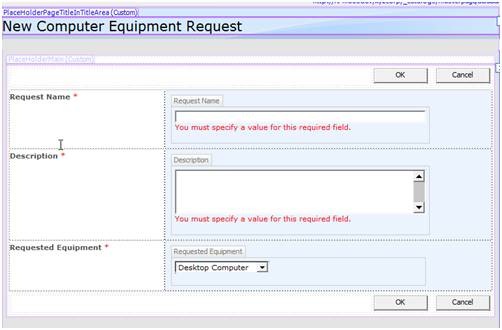 13. Now that we have our custom NewForm looking how we want it to, we need to save it in SharePoint so that we can use it. To do this, click on the Save button, and then navigate to the Computer Equipment Request list and look for the original NewForm.aspx page. For this example, we are naming the page SubmitForm.aspx.
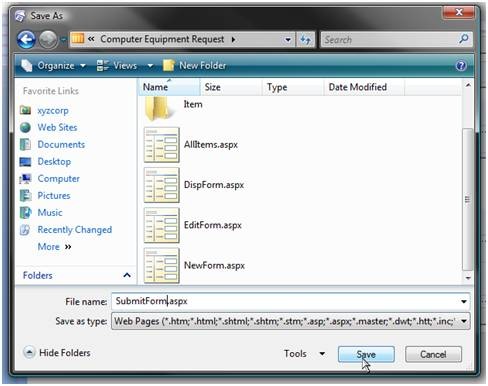 14. Finally, we will want to set our custom NewForm (SubmitForm.aspx) as the default New item form for our list. To do this, go back to the Folder List window select the Computer Equipment Request list and right-click on it. From the menu that appears, select the Properties option.
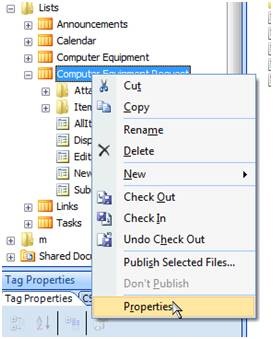 15. In the pop-up box, make sure that Item is selected for “Content type specific forms”. Then click on the Browse button for the New item form to select our custom SubmitForm.aspx.
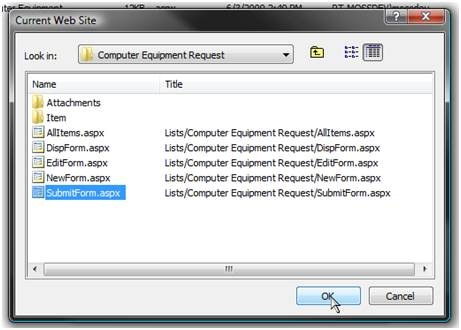
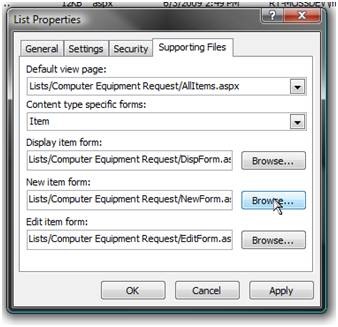
 16. Now your custom NewForm page is ready for use. This is how it will appear to the end-user when they create a new item for the Computer Equipment Request list.
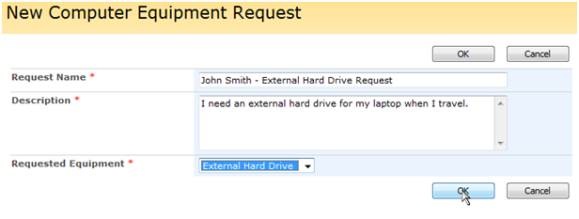 By following the above instructions, you will be creating your own customized NewForm.aspx pages in no time using SharePoint Designer. The same techniques can also be applied to creating custom EditForm.aspx and DispForm.aspx pages.Next time, I’ll show you how to apply these concepts to creating multiple custom EditForm.aspx pages to use with different user roles.
-
Recent Posts
Archives
Categories
Meta

EPIC website 🙂 I’m so happy I wandered onto it through google going to definitely have to add another one to the morning routine…