See also the posts on how to make and assemble the models and Sliceform templates and Downloads
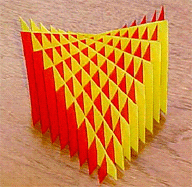
This Sliceform surface is available in two versions, a simple one which takes about 10 minutes to cut out and assemble since it has only six slices and a more advanced one which has 16 slices and takes about an hour to make. They are variations on the hyperbolic paraboloid and not different versions of the same model. The advanced one is a skew hyperbolic paraboloid based on the zonohedron Sliceform model.
What is a hyperbolic paraboloid?
This is a surface which is shaped like a saddle.
If you intersect the surface with three perpendicular planes, in two directions the curve you see on the plane is a parabola, and in the other it is a hyperbola.
A parabola is a common curve which can be drawn using a set of tangents (that is drawn as its envelope). It is commonly seen in curve stitching.
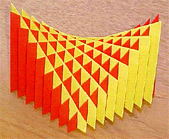
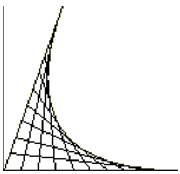 If you look at the pictures of the models above, a parabola is clearly visible. A hyperbola is obtained by cutting the surface horizontally.
It is not surprising that a hyperbolic paraboloid (which is a three dimensional surface) can be created using a type of curve stitching in space. A surface that is made from a series of lines is called a ruled surface.
The simple, 10-minute Sliceform hyperbolic paraboloid is formed as a ruled surface by taking two lines on opposite faces of a cube and dividing them into an equal number of parts. These lines are different non-parallel diagonals of the faces and are known as skew lines because they can never meet in space.
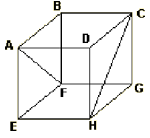 The lines are joined starting by joining A and H and then moving from A to F and joining a corresponding point on H to C so that the final points joined are F and C. This gives the surface like this:
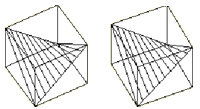 This is a stereoscopic pair (a bit like the 3D posters which were popular a few years ago). If you stare at the image and cross your eyes slightly, so that a third image appears between the two of them, then you will see the three dimensional version of the ruled surface.
If you use a similar set of lines using the two skew lines formed by joining from the points A and H and from F and C, amazingly, the lines lie in the same surface.
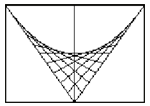
If you look at the ruled surface from an edge of a cube, it looks like this:
Not only can you see the parabola, but the lines make it look as if it is a curve stitched one.
How the models are designed
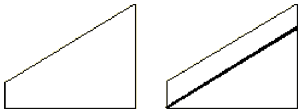
The simple, 10-minute Sliceform hyperbolic paraboloid is formed from a cube by making slices parallel to the vertical faces of the cube, through the ruled lines of the surface.
This gives a set of slices like the one at the left. Part of this slice is then cut off, as shown at the right to give the slice for the Sliceform.
For the advanced model, a zonohedron is the starting point instead of using a cube. For this model, the complete slices are used, not a cut down version as with the simple one.
The 10 minute hyperbolic paraboloid template
Download the file you want for printing and use that to create the model. The following graphic is to help you understand what the slices look like.
The slices for half of the model look like this:
See the post on how to make and assemble the models for more about printing or copying onto card.
Assembling the 10 minute hyperbolic paraboloid
See the post on how to make and assemble the models for more about cutting out and cutting the slots. Take extra care with the slots.
Since there are only a few slices, cut out all the pieces and cut the slots on each one.
The simple model only has six slices. In each direction there is a rectangular slice, which is the central one in each direction. In the ruled surface diagram, this corresponds to the line joining the centre points of the lines on opposite faces of the cube.
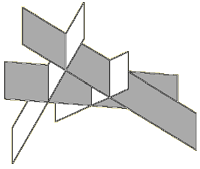
Fit the centre rectangles together, then add one slice in each direction as follows.
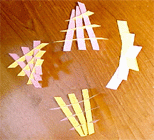
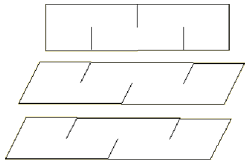
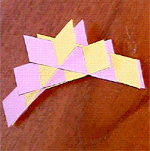
When you fit slices like this, always ensure that the “corners” of the top part fit together symmetrically like a butterfly opening its wings as at the top of this diagram.
The slots are cut so as to weave the slices together. This stops the slices falling apart when you have assembled them all.
When you have made the model, fold it flat in two directions.
Activities
The following are some ideas to explore:
- How many different versions of the model can you make by varying the colours?
- Is it possible to make versions that are mirror images of one another?
- What is the relationship of the model to the tetetrahedron?
The advanced skew hyperbolic paraboloid template
Download the file you want for printing and use that to create the model. The following graphic is to help you understand what the slices look like.
Two slices for each half of the model look like this:
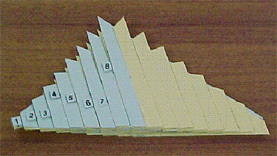
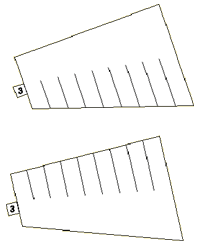 In the top one, all the slots come up from the bottom and in the lower one they are all from the top. Note also that there are numbered tabs to identify the slice while you are assembling it. These tabs should be removed when the model is complete. As well as showing the order for the slices, they also show which way round it fits in the model.
Assembling the advanced skew hyperbolic paraboloid
See the post on how to make and assemble the models for more about cutting out and cutting the slots. Take extra care with the slots.
There are 16 slices. Although you can cut them out before assembly, since they are numbered, it is easier to cut pairs and then assemble them.
For this model, work in pairs with slices from 1 to 8. Fit the smallest slots in both slices numbered 1 together, then add both numbered 2, keeping the tabs in the same direction.
When you have assembled the model, fold it flat in two directions. You might find that it resists to start with and then suddenly jumps flat. When it is folded so that you have a flat base, hold it between your thumb and forefinger and tap it gently on the flat base to bring the slices together evenly.
When you open it out, the tabs stick out and can be cut off.
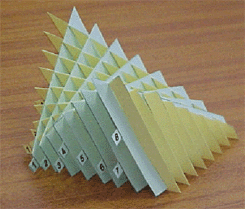
When you flatten the model, without the tabs, one way is similar on both sides:
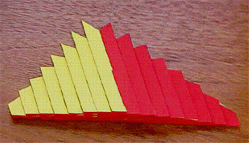
But the other way it is not, and then you can see the parabola showing different “designs” when you turn it over.

The parabola is obvious when the model is open also

this is really good but can you please make the instructions for the hyperbolic paraboloid advanced easier. mine turned out good but it took me ages to start doing it properly. thanks alot though
I am not sure how I can add anything. Since you were successful, have you got any suggestions?
I assume you made the 10 minute one first
John S