Tutorial: How to Tie a New Fall Hitch (4 Plait Point)
 Tying a fall hitch from scratch as this tutorial shows is generally only necessary if you’re a whipmaker who is finishing a whip or if you are a whip owner whose whip has loose or broken strands at its point. If you are a whip owner who needs a fall replaced but the fall hitch and the strands just before the fall hitch at the point are intact and still tightly and smoothly sitting in next to each other, there is a MUCH easier way to replace your fall. We plan to very soon also post a shorter tutorial for that easier method, but since we had this particular whip in for a fall replacement and full point repair just recently, now seemed as good a time as any to go ahead and create the tutorial for a full re-tying of a fall hitch.
Many people choose to send their whip to a professional whipmaker for this type of repair, so if you don’t feel comfortable with or want to try it yourself, don’t feel bad. Most whipmakers (ourselves included) are happy to perform this whip repair fairly inexpensively. The majority of the whips out there today end in either a 4 plait (common for cowhide whips), 6 plait (common on various kangaroo whips and Indy whips), or 8 plait (common on higher plait kangaroo whips) point. This tutorial is only specifically for 4 plait points, although the basic concept behind this particular method of creating a fall hitch can be applied to re-tying fall hitches on 6 or 8 plait points too.
Also, please forgive the large number of pictures/steps. It’s not as easy as replacing a popper, but it’s actually not as complicated as the number of steps implies either – we just wanted to try to be as clear as possible with the instructions. On that note, if you have any problems re-tying your hitch using these instructions, please leave us a comment and let us know where you ran into trouble.
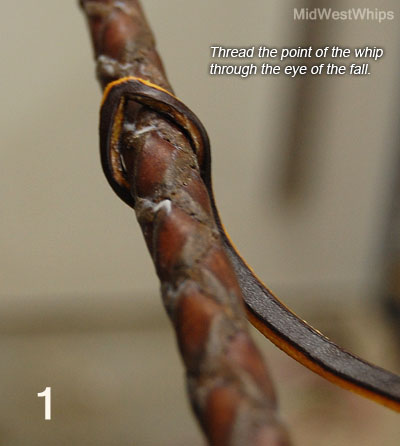
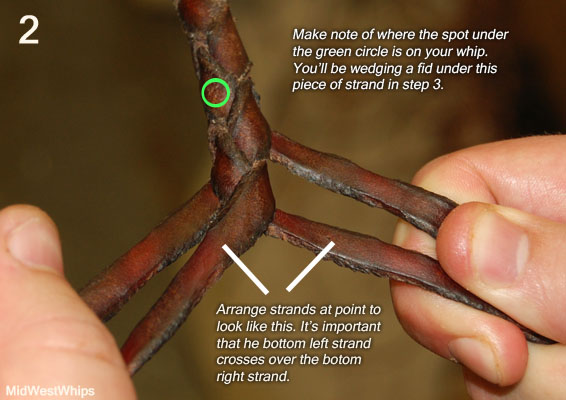
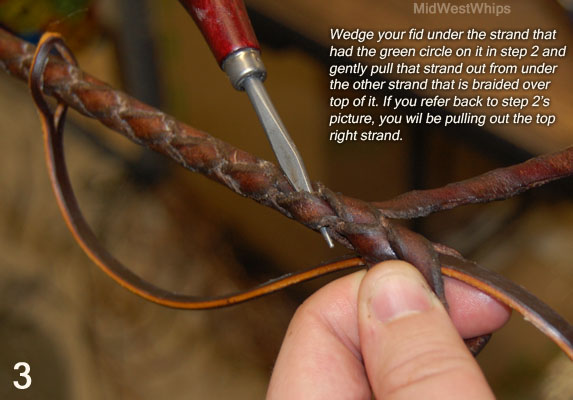
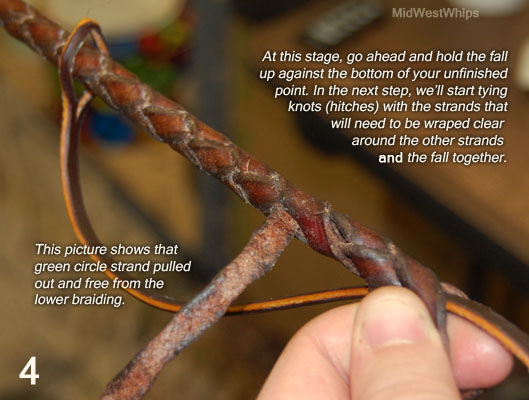
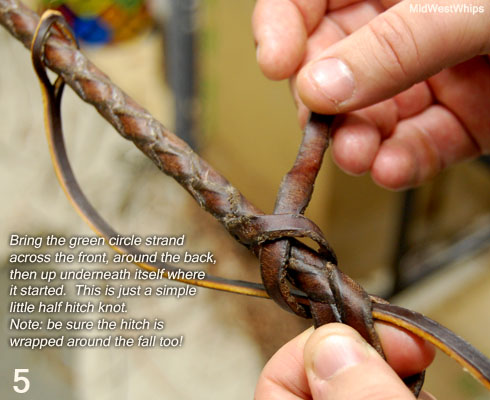
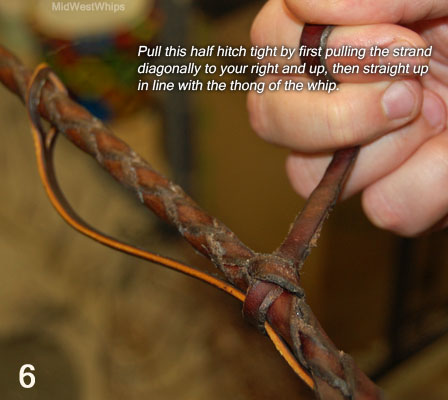
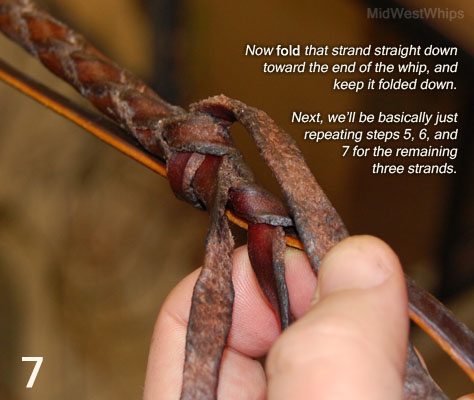
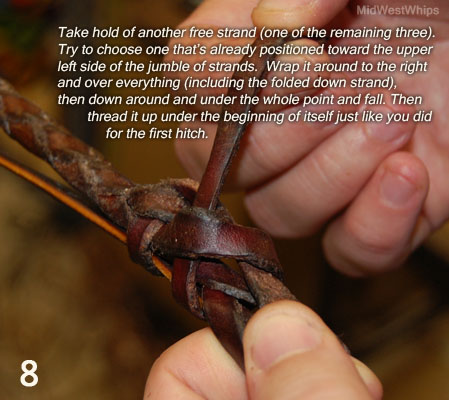
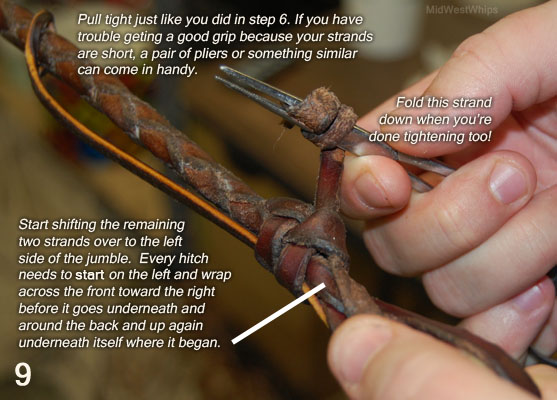
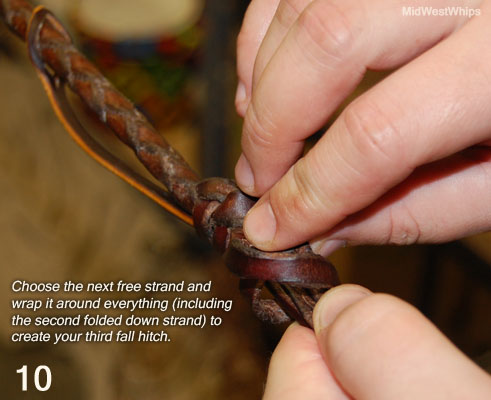
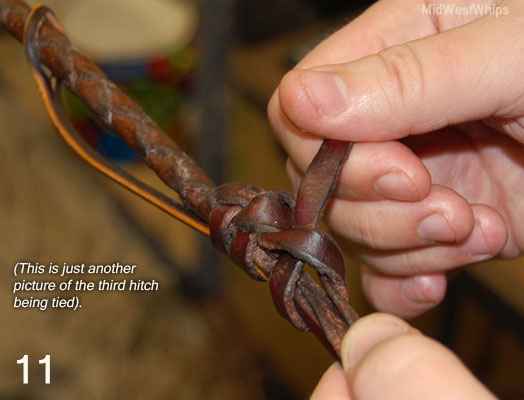
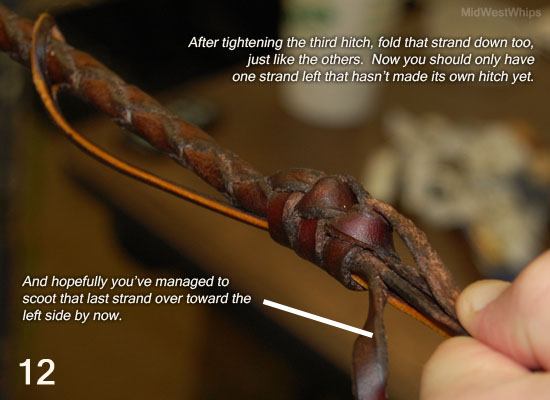
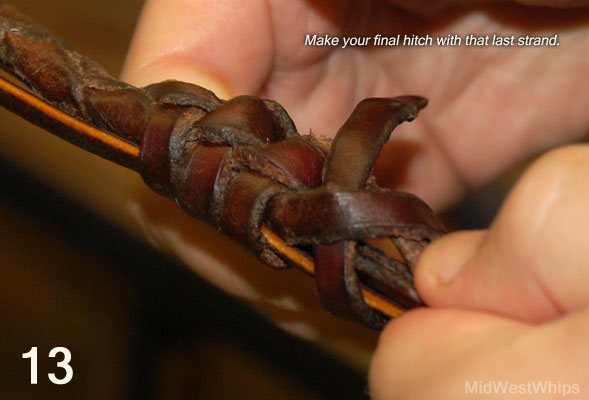
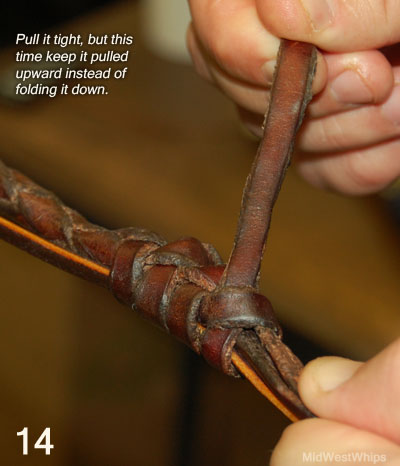
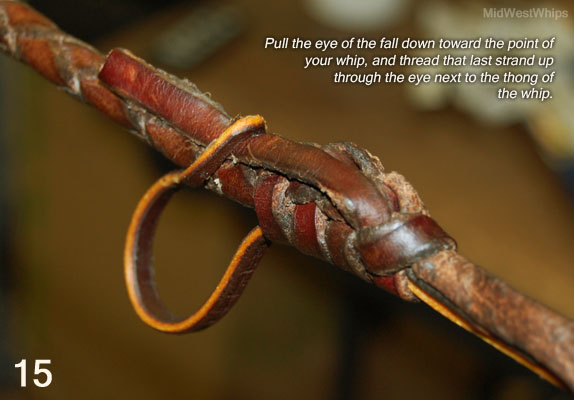
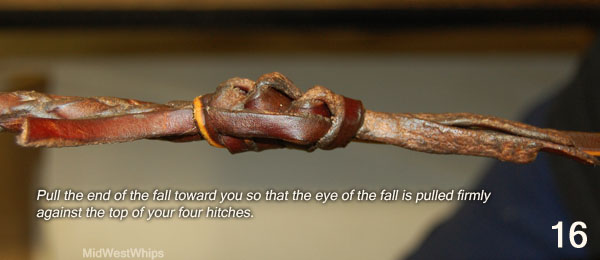
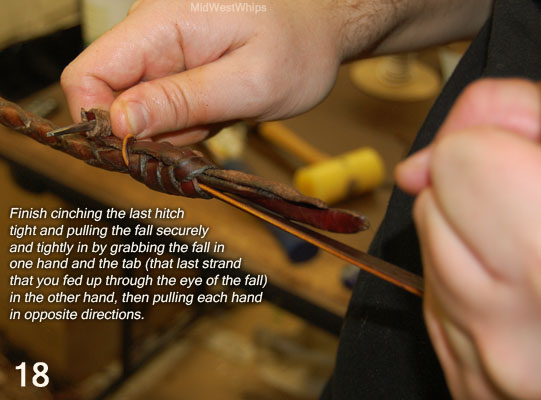
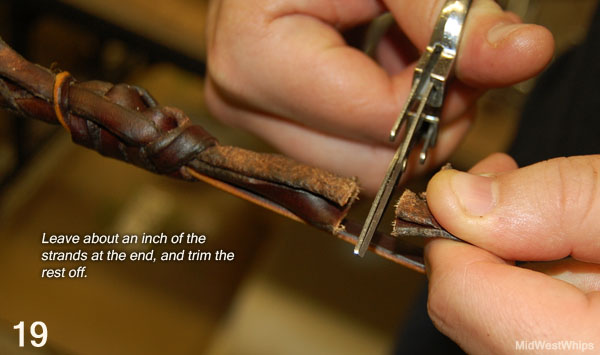
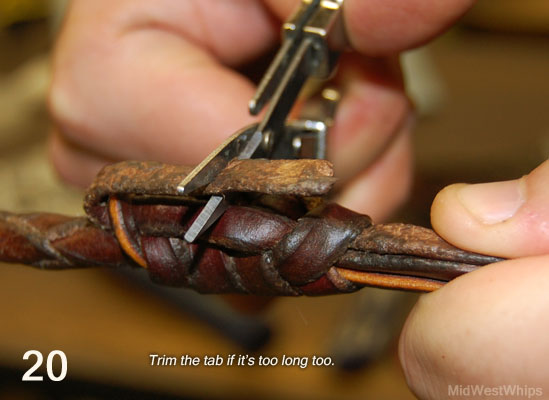
The numbers of the steps are in white in the corners of the thumbnail files below. Please click on the thumbnails in order to view the larger image files with instructions for each step printed directly on the images.


Update 1/6/11: Click here to see a video by Joseph Strain demonstrating this same basic hitching technique on a six plait point.


Hi Lauren & Paul. Thank you so much for such a comprehensive tutorial!!! I’ve been having some trouble tying hitches correctly, and the pictures dispelled all the doubts I had about the procedure. I’ll certainly put this into practice when making my next whips.
All the best,
Aldo.
Excellent! I’ve seen this 4 part a few times and wondered about if there was anything going on under the hood! Thanks!
Reblogged this on Madidos Leather and commented:
Really detailed set of repairs by some of the better makers out there!