I started pulling off other components in the engine compartment. Here is some sort of relay box under the battery tray.

And here’s the back side of the box.

Like much of the wiring, these cloth coverings are so faded I can’t easily tell what the colors are. That’ll make replacing the harness more difficult!
Here’s the brake vacuum assist bellows.

I began randomly disassembling stuff on the hydraulic cylinders and booster. The pieces cover up however the pedal box (on the engine side of the firewall) is mounted. Here’s a large pivot for one of the cylinders.

Here’s the linkage at the end of the vacuum bellows.

Here’s the odd stack of parts holding on a side bracket in the pedal box. The whole region is sort of a Chinese puzzle to me. There isn’t enough room to swing a wrench very far and none at all for sockets. Slow and tedious work.

Got the bellows out —

Always satisfying to finally hold parts that resist my efforts —

There are a couple of throttle pivots nearby —

A close-up of the upper —

And the lower —

Here’s some of the upper pivot disassembly detail —

And the pieces behind that —

At this point I started to wonder about what was holding the pedal box in place on the firewall. The parts book didn’t show it but I could see studs or bolts at the corners coming from below. A little contortionist twisting showed me this.

Yep, there are bolts down by the driver’s pedals. Hmm, I’ll come back to this after I either pull the seat out or I’m feeling more flexible!
Going back into low-hanging-fruit mode. Here’s the gas filter bowl.

Say, isn’t there supposed to be a filter in there? M.I.A. I guess. The bowl is also supposed to be clear but a couple of days soaking in parts cleaner fixed that and the grunge shown on the lid here.

Here is a close-up of the filter bracket mounting–

The part it bolts to is held in place by one of the main front frame bolts.

Here is the vacuum accumulator or reservoir on the passenger side of the engine —

It is held on by four bolts. Once again there is no room to swing a wrench or fit a socket. What an amazing pain in the rear this car is to wrench on! The name of this post, Black Rain, is not an allusion to a Michael Douglas movie but rather what happens to me every time I have to roll under the car to wrench on something. The grime and grease just showers me as soon as I vibrate anything. Nasty!
Here it is on the bench —

And after I started to clean it —

Now I’m worried that after cleaning it up it won’t hold vacuum. I think grease is holding this entire car together!
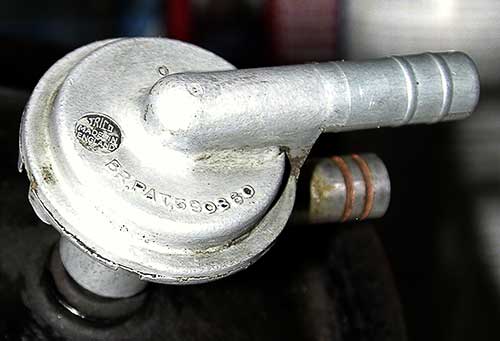
Hey look, a patented one-way vacuum valve —

Now what do you imagine was so special about this one that they deserved a patent? You mean it isn’t just a leather flap or similar archaic nonsense?
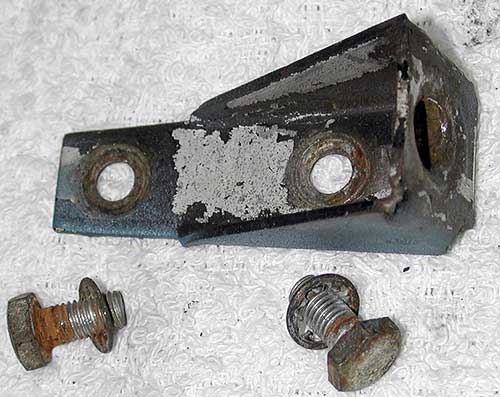
Here’s a bracket on the passenger side of the engine compartment. I have no clue what purpose it serves yet. But I removed it anyway.

I believe this is the windshield washer fluid bottle holder. But I’m not certain, not having a bottle.

Here’s the upper bracket assembly detail —

Here’s lower bolt. Well the pieces that would make a bolt if the head hadn’t sheared off! Give me a break! I happened to be using a tiny 1/4″-drive ratchet at the time. Grrrr.

Here’s the bonnet latch on the passenger side —

And the driver side. Yes, missing a bolt —

Here’s the exploded view of the parts.

My shafts had just about welded to the pivot with grease turned to stone. Very hard to turn or remove.
Here’s that other latch-related part, a receiver for a pin or some such on the bonnet.

Here’s a widget that is over the battery. And the positive battery cable comes from it. Maybe the regulator? By the way, I have no idea if dad converted to negative ground, and he doesn’t remember, so don’t take my wiring as gospel!! But a red cable from the regulator makes me think he might have.

Here’s a collection of black wires to a lug on the side.

And here’s the widget on my bench with its bracket. It is held to a frame member, like many things in the engine bay.

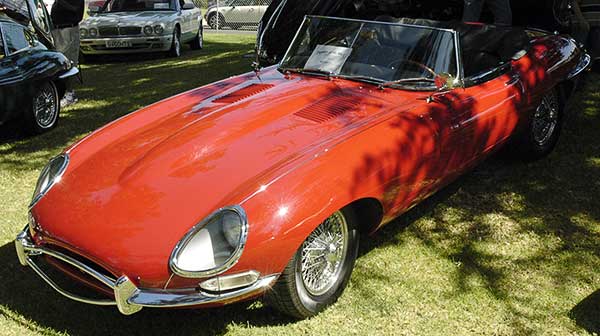
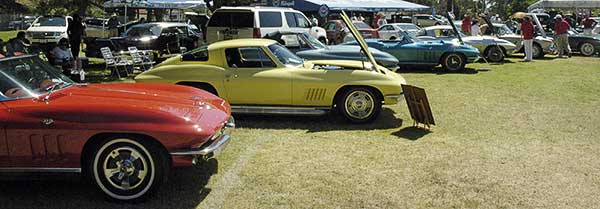
How about some non-Jag stuff?
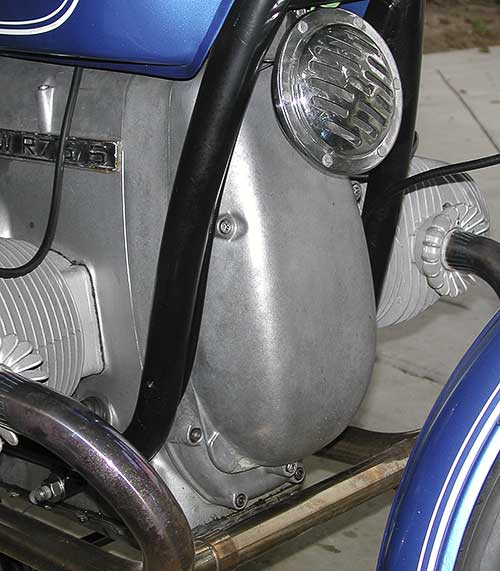
After that last 300 mile ride on the 1973 BMW R75/5 I decided that maybe a small windshield would be a good idea. The highway miles on that 110 degree day were harsh! I didn’t want a whole-hog period-correct frame-mounted Windjammer fairing. Some other /5 owners reported good results with the smallest Maier screens sold by JC Whitney. These are handlebar mounted and there is a risk of instability on short wheelbase /5’s but mine has been ultra stable so far. I’ve got more risk of going insane on my next all-day ride if I don’t try something! One week after ordering, voila —

Seems to be just the ticket. Took it out for a maiden voyage to the highway for high-speed testing and as soon as I hit the road it cracked —

I heard a noise like a brief metal-on-metal grind as I was accelerating. I started to panic over a possible transmission or starter-to-flywheel issue. Nope. Just the sound of acrylic shattering. Sigh. The instructions warned me not to over tighten (while not providing any torque value). The screen is held by two bolts, with rubber disks sandwiched between same-size plates. I used Loctite as suggested and tried not to apply excess torque. But we know I am a monkey-with-a-stick. Guess we’ll see how good JC Whitney’s return policy is.
Had better success in the guest bathroom. Remodeling is complete!

I would have been fine with ceramic tiles but for whatever reason she-who-must-be-obeyed wanted natural stone. So what you’re looking at is WAY more expensive than it had to be and, to me, doesn’t look any better. Jacuzzi tub, check! Weird contrasting wall colors (not in photo), check!
Hey, back to the bike. Just finished the SC-MA’s Bare Bones ride with Joe. Not quite as hot as the sun. Gary didn’t come but we found a nice fellow named Bill who rides a ST1300. So if Gary doesn’t come along soon… he can be replaced! I had, um, a spot of trouble on this ride. As Joe and I are pulling up to the start, a Harley Davidson dealer in Fullerton, I’m hearing an awful howling racket from my R75/5. I mentioned to Joe I’d been hearing a noise on-and-off this last week but it was a momentary metal-on-metal grind and it’d stop. It was all-quiet when Joe and I left from my house. But when I pulled into that HD lot the sound was a constant grindy howl.
I had been thinking maybe something backed out in the clutch area, touching the disk, or possibly the starter pinion not fully retracting. Joe thought it was coming from the front end on the engine. So I whipped out my tools (never leave home without ’em!) while Joe went looking for the doughnuts and coffee. Lots of other riders stopped by. Everyone likes an old bike. Heck, I like OTHER peoples’ old bikes. And everyone like to watch OTHER people turn wrenches.
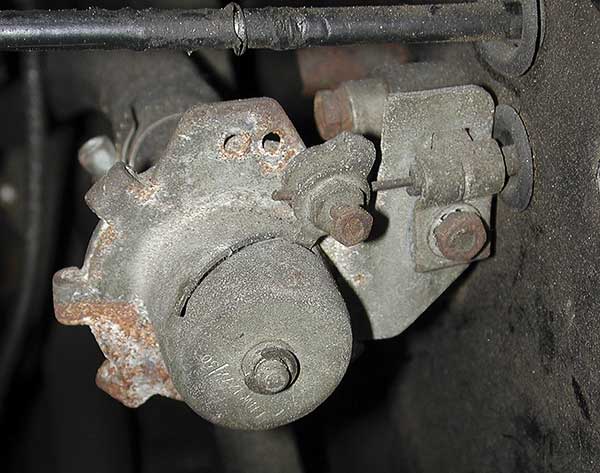
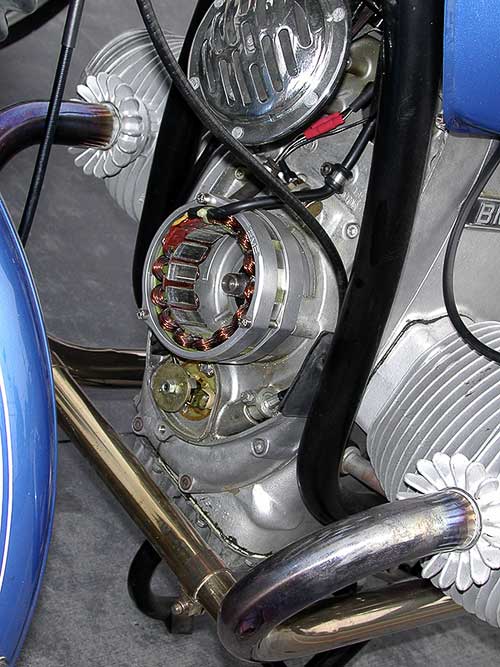
Geez, that airhead engine retains a lot of heat! I popped off the front engine cover and we found the problem. My alternator’s rotor was not turning in the stator. But it was sort of trying and causing that gruesome howl. The crank bolt that retains the rotor was backed out.
Here’s the front end with the rotor pulled off —

And here’s a closeup of the engine crank end, showing a galled surface —

That’s supposed to be a polished conical end! I had a bitch of a time getting the original rotor off it, shown somewhere in my R75 restoration blog.
Here’s the mating rotor section, possibly even MORE galled —

And gosh was THAT a hot potato to handle too, even after fifteen minutes of letting it cool! I replaced the old charging system with converted Ducati parts, sold as the EnduraLast system. All the newer BMW riders there got a kick out of me having Duc parts on this bike.
The rotor was also galling up its larger O.D. and the inside of the stator. Fortunately none of that damage looked terminal. Well, what are we to do? It seemed that we couldn’t get the crank bolt to hold the rotor tightly enough. So Joe found a too-large washer somewhere and we used a multi-tool wire cutter to cut it into a few pieces that we could slip behind the crank bolt’s washer. I cranked the bolt down while Joe held the rear brake on and a quick start verified we were functional!
So off we went. I left the front cover off just in case we needed to work on it again. That cover just prevents shorts and keeps bugs out of the system. It is vented for cooling in later years but my ’73 cover is solid.
We tagged along with four other guys on modern BMW’s (R & K-bikes) and Goldwings. We were lazy and figured they’d work out the route. Turns out those guys ride, um, fast. We had a lot of highway miles to cover on this ride and I still didn’t have a fairing. Grrrr. Turns out the R75 was plenty stable at 90 MPH. Who knew? Of course, I was wind-blasted back to the stone age. It also handles pretty well in corners and they didn’t pull on me in the twisties, just on another stretch of relatively straight back road where they must have wanted to shake me!
One of our checkpoints, about 130 miles after the start of the ride, was the Hidden Springs Cafe. Here’s the photo I took here. Nice adventure travel stuff eh?

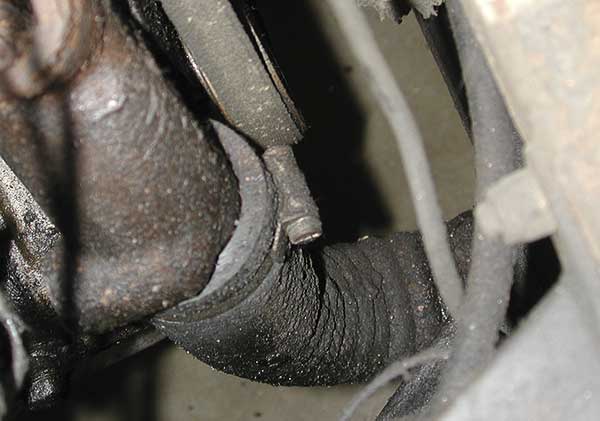
As we’re pulling into the gravel lot everyone comes over to point to the oil spurting out of my crank seal, dripping on my exhaust cross-pipe, and threatening to end my ride right quick! More Black Rain!
The crank bolt had backed itself out far enough that the rotor not only stopped rotating but also pulled forward. The rotor sleeve is part of the crank end seal so naturally oil was spurting. There was no warning grinding noise this time, must have loosened fast. Probably all that redline RPM I was running to keep up with the big dogs. Nice to see I had oil pressure though. Heavy sigh.
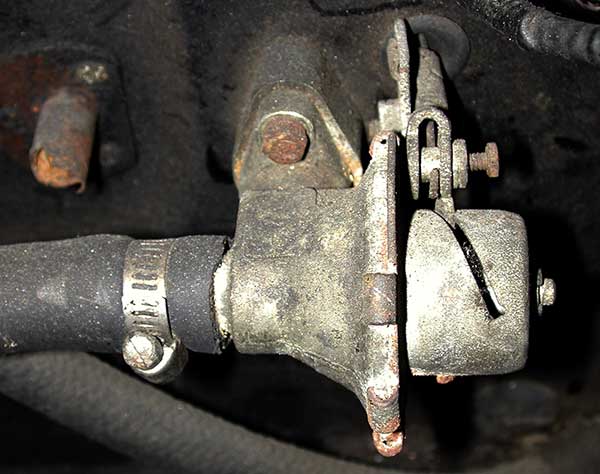
Here’s what the front end looked like.

You might be able to see how discolored my stainless cross-over is and if you look close you can see the crank bolt sticking out of the rotor. Should be about flush with the end of it!
So out come the tools and I tighten it down again. Check my oil and it looks like I’m a quart down. Lucky we had a stop there! Did I mention that my oil pressure light is the ONLY instrument lamp I never got working? I’m quite paranoid for the rest of the ride. I keep “hearing” that grinding noise so I have Joe ride next to me to look at it, “is it still turning?!” “Yep.” About a half dozen times. Until I got it home.
Phew! You realize this failure is a double-whammy. Not only would I be losing oil, my bike’s lubricant AND coolant, but I also would be running solely off the battery, getting no charge. Talk about broke down and busted! Here’s the pin I have to show for the effort.

Time for a bottle of ale!
I need to work on that crank end and rotor. Probably won’t get to it until next week. I have to remove all that galling on both parts and clean up the crank bolt threads. It should not be backing out like that. I have to be careful not to ruin the concentricity so maybe some lapping compound put between the parts? I might grind the end of the rotor 10-20 mils so I can be sure it is seating all the way on the cone. That back edge isn’t critical and maybe it is slightly long. Running the motor with a fine grit against the cone sounds like a good idea, sort of a lathe action, but oil is going to spurt on me if I do that! We’ll see. But I should fix this better before returning to XKE destruction.
Look out, monkey with a stick!