A couple of weeks ago an article was reposted on SQLServerCentral.com, which discusses hierarchies in SQL (by GSquared). The basic premise of the article is how to handle parent / child relationships in the same entity table, such as a manager / employee relationship within the employees table. As GSquared mentions and links to sources on the same, once the ID / ParentID columns are set up, generating the parent / child hierarchy can be handled quite easily using a recursive Common Table Expression (CTE). But then someone in the discussion thread on the article made things a lot more complicated, asking the same question I had to solve not a week before.
What if you’ve got a recursive relationship on the surrogate key of a slowly changing dimension (SCD)? So what, just add a new record and update the parent surrogate ID. Done right? Not so fast.
How Dimensions Interact with Fact Tables and Reports
Before we can dive into how to solve this problem we have, but don’t know we have… huh? … First let’s talk about how dimensions are used to build fact tables and in reporting.
When a fact table is built, each row is filled with the surrogate keys of each related dimension and the facts relevant at the time of record. A record in the fact table and associated account dimension entity might look something like this:

And then let’s say the next time a record was recorded in this fact table for this product flow, the related account had a change in contact info, which generated a new record in the slowly changing account dimension. Our records now look like so:

Notice the SSIS pack managing your SCD dutifully updated the RecordUseStart and RecordUseEnd fields, so the fact builder would know to use the new account record when building the new row. It uses a ranking script you created to update the UseStart and UseEnd fields based on RecordInsert rank. (I’ve uploaded a ranking script to use for this operation at the bottom of this post) The newer record’s start date is the previous records end date. This bit of logic allows reports to show the account level attributes at the time the information was recorded. A very important piece of any proper data warehouse.
In a July report on production flow under each contact, the information would look something like this:
![]()
But what if this account had a parent?
Dealing With Parent / Child Keys in an SCD
New scenario: A parent account uses child accounts to do its ordering and, therefore, child accounts are associated with the product flows in your fact table. The parent / child relationship is held in the non-SCD Accounts table in the transactional system. The Account table is how your SSIS pack builds the surrogate key recursive relationship. Let’s add parents into the schema and report from above:

![]()
So the next day, another contact is changed, but this time in the parent. Your SSIS pack puts the new parent record into the dimension and updates the UseStart and UseEnd dates perfectly. Your fact table builds perfectly, just like it did the previous day. But you get a call from management. The report does not reflect the change in contact. It still shows Kelly Achtung as the parent contact. … Hmm this isn’t right. It’s supposed to show 2 records for Kelly and 2 for the new contact, Jack Sterns. You check your DimAccounts table:

It’s not a bug; it’s a feature!
The ParentAccountKey didn’t update! The child accounts should now have 763 as their parent account. … But then you’d not be able to generate data with historical accuracy, because the child accounts will no longer be related to the old parent account. … So you need to keep the original relationship, but make new records for the new relationship.
In order for your SSIS pack to populate ParentAcctKey fields correctly, it needs to know which parents are associated to the children at which times of production. The transactional table is no help, as it doesn’t hold history, so the SSIS pack uses the following query leveraging RecordUseStart and RecordUseEnd dates to figure it out.
--JA: Set ParentAccountKey
UPDATE TChild
SET TChild.ParentAcctKey = CASE
				WHEN TChild.NtrlAcctKey = TChild.NtrlParentAcctKey THEN TChild.AcctKey
				ELSE TParent.AcctKey
			END
FROM
	@DimAcct TChild
		INNER JOIN @DimAcct TParent ON TChild.NtrlParentAcctKey = TParent.NtrlAcctKey
			AND TChild.RecordUseStart >= TParent.RecordUseStart
			AND TChild.RecordUseEnd <= TParent.RecordUseEnd
Logic tells us that in order for a child record to have the same parent throughout its lifespan, the parent must have RecordUseStart and RecordUseEnd dates that encapsulate the dates of the child record. This way any date referenced that pulls up the child record will also pull up just the one parent.
Here are the different scenarios the SSIS pack must figure out:
 Both New |
 New Child |
 New Parent |
The first scenario is cut and dry. Parent and child both have new records generated at the same time, so they both have the same RecordUseStart and RecordUseEnd dates. Nothing interesting here. The SSIS pack will easily assign the correct parent.
Second scenario is also easy. Child gets new record. Child has newer RecordUseStart date than its parent and the same RecordUseEnd date as its parent, so again the SSIS pack assigns the correct parent. No extra code needed.
Now the third scenario is odd. The SSIS pack created a new parent, and now the child does not have the same parent at all points of its lifetime. At the beginning of its life, it should point to the original parent record, but now its parent record has received new data and been split to a new record, so it should point to the new parent from that point on. The SSIS pack returns two records in the join from above, and no matter which you have it choose the choice will still be wrong at some point in time.
Like Father, Like Son
At this point the obvious (obvious if you’ve had your coffee this morning) solution is to force the child to split when the parent does. If you split the child at the same time, the choice for parent becomes simple, just like the image from above the RecordUseStart and RecordUseEnd dates will match perfectly. So how do we go about picking out the children who’s parents just received new records?
Alter the statement from above to collect a list of children who have duplicate parent records after the SSIS package changes the dimension. The statement looks like this:
INSERT @DimAcct
SELECT
	764 --JA: simulating IDENTITY(1,1)
	,TParentNew.AcctKey
	,TChild.NtrlAcctKey
	,TChild.NtrlParentAcctKey
	,TChild.AcctName
	,TChild.AcctContactFirst
	,TChild.AcctContactLast
	,TParentNew.RecordUseStart
	,TParentNew.RecordUseEnd
	,TParentNew.RecordInserted
FROM
	@DimAcct TChild
		INNER JOIN @DimAcct TParentOld ON TChild.ParentAcctKey = TParentOld.AcctKey
			AND TChild.RecordUseEnd > TParentOld.RecordUseEnd
		INNER JOIN @DimAcct TParentNew ON TChild.NtrlParentAcctKey = TParentNew.NtrlAcctKey
			AND TChild.RecordUseEnd > TParentNew.RecordUseStart
			AND TChild.RecordUseEnd <= TParentNew.RecordUseEnd
This script links old and new parent records to children with Start and End dates that span the old and new parent records. It inserts a new record into the SCD for the child pre-assigned to the new parent record. It also uses the Start and End of the new parent record. All that’s left is to update the old child record’s RecordUseEnd field, so it doesn’t overlap with the new child record. Re-run the script you use to set the RecordUseStart and RecordUseEnd dates in chronological order (check file linked below).
Mystery Solved!
So there we have it. Now when we run a query at any time, we’ll get the correct child account along with its correct parent. Now I’m sure there is a more impressive way to get the job done on this one, but this is good enough for me (seems I constantly run out of time when I’m developing!). I hope this post helps shed light on this SCD dilemma.
Please comment if you find a better way to do this, or have any questions.
File
Creating a Solid SSIS ETL Solution: Navigation
Part 1. – Package and Error Logging
Part 1. – Package and Error Logging (cont.)
Part 2. – Package Configurations
Part 3. – Package Template Overview
Part 4. – Email Task and Package Execution Report
Updated Sample Files
If you’ve been following along with this series, I just updated the sample files, mainly concerning the report and associated sprocs. Please re-download the zip for all the updated goodies.
Execution Information
Up to this point we’ve discussed creating a custom SSIS execution logging and error capture system, package configurations, and a general overview of my SSIS package template. There are two minor pieces to go over to complete this rudimentary ETL framework: the Email Task and a report for viewing SSIS execution results.
Email Task
The email task included in my package template is a very handy notification tool. Throughout package execution, each PackageLogDetail start and end (Data flow tasks) append resultant information to the SSISPackageLogResultMessageForEmail variable, which is then sent out in an email body via the Emal Task at the end of the package. The recipients of the email will receive a detailed breakdown of what flows the package processed and the general results. If an error occurs, the body will have all the successful flows followed by the name of the flow which crashed along with an error code and message. So not only does the email show the error, it lets the recipients know which flows processed successfully before the error occurred. This makes it easy to manually process the remaining files by putting only the unprocessed files into the source folder, and manually executing the agent job which fires the package. (A separate way of accomplishing this is to check the execution report to see which flows [files] were processed before the error occurred.)
(As a side note, the Global Container is not actually needed to ensure the Email Task fires. If the Email Task precedence constraint is set to ‘Completion’ or ‘Error’, it will fire regardless of the outcome of previous tasks. The Global Container can be removed if necessary.)
The Email Task in this package template is also very dynamic. Let’s look a little closer at the task in Edit mode:

Email Task Editor - Mail
As can be seen in the image above, we are basically building an email. Starting from top to bottom:
- Select your SMTP connection
- Anything can be placed in the from clause. I’ve chosen a static, fake email address so I can make email sorting rules.
- The To, CC, Subject, and MessageSource (body) are all filled by expressions, which we will discuss in the next paragraph.
- If you feel it helps, you can set the priority of the mail being sent.
- The Email Task can also send out an attachment. This can be virtually anything (Error log files, etc).
The Mail tab contains all the standard set up for an Email Task, but static information in these fields would make the email fairly generic and not very informative. This is where the Email Task in this package template shines. I’ve included all kinds of good info in the email sent out from this package. Let’s look at the expressions I’ve built:

Email Task Editor - Expressions
As can be seen there are a lot of goodies packed into Subject and MessageSource.
The Subject line is built to tell the receiver immediately which package is sending mail and what the result of the package was. The default values set up for the result variables for the package are set to ‘Failure’ (ResultTypeID 3), which means if the package fails before it can even write the start of the package log, the email will show up as a package execution failure. As the package enters the meat of the control flow, the result id is changed immediately to a success (ResultTypeID 1), so if all goes well, the package will report success instead of failure. Now should the package encounter some issues, such as a package system failure or business rule / system failures in a data flow, the result ids will be changed at that time to the appropriate results: 3 for a total package failure and 2 for bus or sys failures in data flow. The SSISPackageLogResultID allows the email to dynamically set the result text in the email subject line.
The MessageSource is more detailed, obviously. A lot of great information is contained here, which should allow the recipient to quickly zero in on the offending package and source of error. The MessageSource contains the following information:
- The name of the machine which executed the package. If the package was fired by a job, the name of the SSIS server which executed the package will be listed here. If you fire it from your dev environment (desktop for example) the name of your dev environment (desktop) will show here.
- The name of the package which was executed.
- The task responsible for sending the email (valuable if the package fails).
- Finally the SSISPackageLogResultMessageForEmail, which should contain the results of any successful data flows as well as error code and message, if a system error occured and the package failed to complete.
From this information, it is very easy to troubleshoot what happened to the package.
As a warning, the email task will not fire and so nobody will receive a failure email if the package does not at least begin to run. In my experience this can be caused when the package configurations set up in a package do not have corresponding configurations in the SSISConfiguration table or configuration XML file (a typo can misalign everything). Basically anything that causes the package not to be able to be initiated will cause no email to be sent. In my opinion if you want total assurance you will receive some kind of notification if there is an error, I would add a database email alert to the job responsible for executing the package. At least this way if a configuration(s) becomes misaligned you will get some kind of heads up that something is amiss. Another place to look for error information if the package fails to start is the job history.
SSIS Execution Report
A second, powerful way to receive information on your ETL system is via the SSIS Execution Report I created. This report takes a StartTime and EndTime as parameters, and returns all the package execution information stored in the SSIS package logging system for that period of time. The report in general is pretty self explanatory, but some of its best features are:
- Count of how many package executions happened during a month.
- Summarize the execution duration during the month (Good for trending – See if your package execution is growing normally or in an odd manner).
- Count how many rows of data were moved through the system. Also, a breakdown of which were successful, etc.
- Drill down into each package and data flow task to see more detail, even the rows which failed to convert!
- Show the error message associated with a package failure.

SSIS Execution Report
With this report, it should be fairly easy to troubleshoot package execution and data flow issues in order to expedite the move to developing a fix to issues. One thing I can’t stand is spending countless hours troubleshooting trying to find out what broke, when, and why. This report gives you all this information. A time saver for sure.
This report is fairly mundane. There are a lot of improvements which could be made, some of which are a parameter for result type, so a person can easily filter on only failed packages. Another would be a trending graph to show duration and row count growth over time. It would be nice to have these features, but they are outside the scope of this series.
Series Conclusion
If you’ve read all 5 posts, I want to thank you for spending the time checking this out. I hope I’ve shed some light on how to set up a solid ETL solution with SSIS. I know this framework has already helped me tremendously on my SSIS projects, including a new Data Warehouse I’m currently in the middle of developing.
As always if there are any questions, please comment and I’ll be sure to get back to you!
Example Files
Creating a Solid SSIS ETL Solution: Navigation
Part 1. – Package and Error Logging
Part 1. – Package and Error Logging (cont.)
Part 2. – Package Configurations
Part 3. – Package Template Overview
Part 4. – Email Task and Package Execution Report
Ok so we’ve got our logging system set up as well as our package configurations. Now we can examine the template’s pieces with a good working knowledge of what we’re looking at.

Global Container
The first thing I want to ensure when I begin building a package is that it will somehow let me know it has completed or has errored out. I’ve heard many authors of articles mention how they don’t want to get email messages, but if you don’t have an operations department watching servers for you, how else are you to receive information that a specific job failed or a build didn’t work as intended? Personally I love the fact I can get an email from SSIS when a package completes or fails (depending on how critical the package is). No matter where I am I can receive important emails like this on my smart phone. If the data warehouse doesn’t build correctly I need to know about it immediately, especially if I’m on vacation.
In my package template I can set up the package so I get an email on completion, error, or on success (this last option is rather odd, but possible). This is done via the email task at the end of the package. Initially I tried to place this in the OnPostValidate or OnPostExecute handler (at the package level), but these handlers can fire more than once, so I found the handlers to be bad candidates for containing the email task. After many frustrating attempts to put the email task in an event handler, I decided to throw in the towel and just stick it at the end of the control flow.
In order to do this I set up a global sequence container, which contains every other task in the control flow. While this is an ugly approach, it ensures the email task will fire no matter the circumstance.
Package Level Start, End, and Error Logging
A similar approach is taken for package log start and finish tasks (Execute SQL tasks). Again I tried to place these in the OnPre/PostValidate or OnPre/PostExecute handlers, so they’d be virtually invisible to the package, but without success. It’s been awhile since I tried to stick them in there, but if I remember correctly those handlers are not the last things to be executed, and so some errors can be missed if the start and/or end are placed in them.
The first and last task in the global container starts and stops the package log at the package level. Initially the result type ID is set to 3 in case the package fails at the PackageLog Start task (if the log tables or sprocs are set up incorrectly, for example). Once the package log row has been inserted into the SSISPackageLog table via the PackageLog Start task and sproc, the package then enters the extraction container, the name of which is unimportant.
(Since creating this template a few months ago, I’ve found the extraction container to be rather worthless. It can be removed entirely. I will upload a new template to this series shortly.)
Now that the package log has been initiated, the best logging feature of the package has been activated: the error capturing capability of the template. At this point in package execution if an error occurs the on task failure handler will fire collecting the name of the task which failed, then the on error handler will fire changing the result type to 3 indicating system failure, inserting the ErrorDescription variable into the SSISPackageLogResultMessage variable, and collecting the error code and message in the SSISPackageLogResultMessageForEmail variable.

On Error script task - Click to see full image
Once the error flags and messages have been set, the package will try to close out the detail and package log records. The on error handler will either try and close out the current open detail record in the SSISPackageLogDetail table with the error code and message associated or if a detail record has not been created it will create one, again appending the error code and message. While the error handler is closing out or creating the detail record, it will also append and end time to the record. After this the rest of the tasks will fail or be skipped, and the PackageLog End task will fire, closing out the package log with end time and failure indicated by package result type id 3.
If the package log start insert works as intended, the package variables are now initiated in the set package variables script. This particular package template is set up to ingest data from files on disk, so at this point the package will check to make sure files exist to be ingested. This package will fail if it counts more or less than 1 file in the target folder, but it can be modified to either fail if no files are found or continue processing regardless.

Detail Container
If the package log insert works as intended and files are found, the package then drops into the ForEach enumerating container (from here on out called the detail container). At this stage of package execution, I set up a separate detail container for each extraction, transformation, and/or load process. The container type is not important; the only thing that is important is each of these detail containers must contain the Set Variables, File Log Start, and File Log End tasks. The package I added to the sample files contains only one such container, but more can be appended by simply adding a new container with the set variables, start, and end tasks inside. For each new container add a workflow arrow from the previous container to the new container. Just remember to make sure your last container has an on completion workflow arrow to the PackageLog End task.
Inside the detail container the first thing the package comes across is the Set Variables task, which resets the detail level variables: detail result type id, result message, row counts, and in this particular case the archive and source file paths. These variables will obviously change depending on what kind of work you have the detail container doing.
Inside the Data Flow
Once the detail log has been intiated, the control flow enters the data flow task. This is where success, business failure, and system failure record counts are collected as well as where erroneous data is funneled into the SSISPackageLogDetailErrorRecord table. As can be seen in the image below, a concatenation task is created at each juncture of the flow for which we expect a system failure may occur on the data being moved at that time. These tasks concatenate the original row contents, pass them to the union all task, they pass through the system error row counter, and then finally to the ErrorRecord table. This makes it extremely easy to figure out which rows failed conversion, and then by examining the concatenated row data, why the row failed out of the flow. My rule of thumb here is if I think a row has a chance to fail to flow through a task, I pass the failure rows over to the failure collector. It’s so much easier to correct an ETL process when you have the exact data which failed to convert or insert, etc.

Data flow - Click to see full image
One part of the data flow, which can be tricky, is row counting. As you can see in the image and package if you downloaded it is I count the successes and then allow some insert failures to flow over to the error recording side of the data flow. This actually could cause a row to be double counted if it fails the final insertion. In this particular package it is not extremely important to capture the exact counts, but in some packages I’ve created since this template the counts have had a higher priority. To solve the dilemma of double counting rows I do a pre-process row count in a separate data flow before the main flow, and then subtracted the error counts from the pre-process total count to obtain the success count (this is done in the ‘Chg Result Type and Msg’ task). This way my final counts always add up correctly.
Archive and Delete File Tasks
Since this particular template extracts data from files, after the data flow is complete the package archives the file (copy) and then deletes the file (delete). These tasks have been set up with dynamic paths, which were captured at the beginning of the ForEach enumerator in the Set Variables task. This makes it very easy to keep an archive of files in case you need to look at the source file or re-process the file entirely.
One thing of note. Recently I noticed when trying to delete Excel files post processing, the files would be locked from being opened; therefore they could not be deleted. I solved this problem by moving the Archive task to just after the Set Variables task, and then reading from the archived file. This allowed the main file to be deleted as it had no read lock on it. It had only been copied; not opened.
Next: Email Notifications and Package Execution Report
Well that explains the majority of the package template I’ve created. If there are any questions on particular details please comment, and I’ll try and answer your questions.
See you in two weeks when I explain the dynamic email task in more detail along with an SSIS Execution Report I created in SSRS. Expect the post on or before Jan 10th 2011! Have a happy new year! ==>
Example Files
Creating a Solid SSIS ETL Solution: Navigation
Part 1. – Package and Error Logging
Part 1. – Package and Error Logging (cont.)
Part 2. – Package Configurations
Part 3. – Package Template Overview
Part 4. – Email Task and Package Execution Report
Now that the logging is set up, arguably the most important part of the template, let’s move on to the package configuration set up.
Package Configurations Defined
Before I show you how I use package configurations in my template to ease the process of promotion to production as well as how easy it makes variable and connection maintenance, let’s first look into a little of what package configurations are.
As stated by Microsoft, package configurations are basically parameter variables, as you would use them in a method or object. Each configuration is set up and acts like a parameter, which the environment must feed at run time. This solves quite a few issues an SSIS developer may run in to when developing a package with many moving parts. It allows a package to be flexible, so it may be used for many similar tasks; instead of hardcoding several similar packages to handle one task a piece. You could instead use the one package to do it all by simply feeding the package a different set of parameters at run time.
There are many ways to feed the package the configuration values it needs to operate, such as XML file, via table, environmental variable, and registry entry. Explaining the various sources for configuration information is outside of the scope of this post. More detailed information can be found from MSDN here. My template uses only the environmental variable and SQL table types.
Avoid Rebuilding Packages When Changing Environments
At first package configurations seem to be mainly used to make dynamic packages, but one of the biggest benefits of using them is for changing connection strings and paths to files or archives for the promotion path to the production server. Most professional teams developing SSIS packages for enterprise systems have at least three environments to traverse as they move an information system item from development, to testing, to production. This is typically done to keep errors out of the production environment as well as having strict control over the testing environment and processes. One of the biggest problems associated with moving SSIS packages between these environments is the connections and pathways set up in the connection manager have been set for the development environment, and the only way to change them is to open the package in BIDS or VS, change them by hand, and then rebuild the project. This is a very cumbersome task.
To avoid having to rebuild packages each time they are promoted to the next environment level, best practice is to set up package configurations on these dynamic connections and pathway variables, so we can put some intelligence into each environment and let it set them up as it sees fit. Additionally, if we wish to change connection strings or path variable inputs, we can change them in the environment and it will affect all packages that use the same named configuration. Consider if you had a connection used by 20 different packages. It is much easier to update a record or change an XML file rather than update 20 packages by hand, rebuild them, and retest them. This is further exacerbated when you consider this would have to be done 20 times PER environment! Update 3 records or rebuild 60 packages! Easy choice.
Four Kinds of Configurations
This particular template uses configurations for four different reasons:
- One environmental variable packages use to connect to the configurations table
- Connection string configurations packages use to collect the connection strings for the current environment
- File path configurations packages use to collect the pathways for the current environment
- Email address configurations packages use to collect who will receive package execution emails in the current environment
Environmental Variable
First we set up an Environmental variable…. Well I actually can’t find a good link which easily explains how this is done (when I did my research, I had to piece it together from a few different articles), so I’ll list the procedure for Windows 7 and Server 2008:
- Right click ‘My Computer’
- Select ‘Properties’
- Click ‘Advanced system settings’ link
- Click ‘Environment variables…’ button
- In the ‘System variables’ box, click the ‘New…’ button
- In the ‘Variable name:’ field, set the name of your environmental variable (SSISConfigDBConnString)
- Lastly, in the ‘Variable value:’ field, type in the connection string to the database you will use for your configuration table, as the example below shows
Data Source=YourServerName;Initial Catalog=AdminDB;Provider=SQLNCLI10;Integrated Security=SSPI;Auto Translate=False;
I’m fairly sure using provider SQLNCLI10 will work for SQL 2008, 2005, 2000, 7, and Asure.
Time To See What’s Under the Hood
One thing to know about package configurations is each time a new SQL Server table configuration is created, a row is inserted into the configuration table with the current contents of the connection string or file path variable. For this reason, first you should set up all your OLE DB connections and file path variables with initial pathways.
The environmental variable is in place. Now we can open a package, and set up some configurations.
- Open a package
- Right click on the background in the ‘Control Flow’ tab
- Select ‘Package Configurations…’
- Click the check box to enable package configurations
The first config we need to set up in the package configuration is the config which will connect our conn string in the environmental variable to the AdminDB connection in the package:
- Click the ‘Add…’ button
- In the ‘Configuration Type:’ drop down menu, select ‘Environmental variable’
- Now in the ‘Environmental variable:’ drop down menu you should see the variable you just set up, select it
- Click the ‘Next…’ button
- In the ‘Connection Managers’ folder, expand the tree of the AdminDB connection
- Select ‘ConnectionString’, and click the ‘Next…’ button
- Create a name for this config – I try and name all my configs to the same name as what they configure (SSISConfigDBConnString)

Next create configurations for all dynamic connections in the connection manager space. This covers two of the four kinds of configurations in the package template: database connections and file pathways. To do this:
- Click the ‘Add…’ button
- In the ‘Configuration Type:’ drop down menu, select ‘SQL Server’
- In the ‘Connection:’ drop down, select AdminDB
- If the ‘Configuration table:’ drop down is empty because you haven’t created a config table yet, click ‘New…’. SSIS will show a create table script. I added an IDENTITY surrogate key with PK because I can’t stand heap tables. SSIS will use the ConfigurationFilter col to find the config when a package selects it.
- Select a configuration table
- In the ‘Configuration filter:’ field type a name for your configuration (or choose a pre-existing config from the drop down). Remember if you use this name in any configs in other packages, the package will use this configuration, so make sure this configuration name is as unique as need be.
- Click the ‘Next…’ button
- For database connections, expand the appropriate connection and select ‘ConnectionString’ – For variables, expand the appropriate variable and properties folder and select ‘Value’
- Click the ‘Next…’ button
- Create a name for the config

Repeat for all configurations you wish to set up. For the email configurations, I create one variable for ‘To:’ and one for ‘CC:’, which are used in the email task in my template. I believe there is also a ‘BCC:’ field if you’re so inclined.
Next: Package Overview
Now that the logging system and package configurations are set up, I’ll explain how these two pieces come together as the framework of the template, and how to use this template for your needs. See you on or before Dec. 26th! ==>
Example Files
Creating a Solid SSIS ETL Solution: Navigation
Part 1. – Package and Error Logging
Part 1. – Package and Error Logging (cont.)
Part 2. – Package Configurations
Part 3. – Package Template Overview
Part 4. – Email Task and Package Execution Report
In my last post, Creating a Solid SSIS ETL Solution: Part 1 – Package and Error Logging, I forgot to show how errors are logged when a fatal error occurs during package processing. Fatal error capture is essential in troubleshooting a package failure. No logging solution is complete without it.
Keep ‘Em Separated
When I started creating my package template I had originally tried to put all logging and error capture processes in the event handler tab of the template package. I wanted to keep the meta, administrative actions separate from the control flow tab where the main processing of a package takes place. I tried to have the package and detail log start and end tasks fire via the OnPre/PostExecute and OnPre/PostValidate event handlers, but these two event handlers didn’t function as I expected. There were two handlers which did function quite well for my needs: the OnTaskFailed and OnError handlers.
Whelps Left Side! Handle it!
One thing SSIS does a good job of is error messaging. The error messages that are returned when a package runs and fails are easy to read and very informative. When a package failure occurs I want to know four things:
- Which task failed
- What error code is associated with the failure
- What error message is associated with the failure
- If associated with data, which row of data failed (this is something the built in logging does not provide)
To collect which task failed, I set up a simple script task in the OnTaskFailed event at the parent package level. This script fires when an error occurs, and captures the name of the current task into a variable called v_SSISPackageLogTaskName.
OnError Handler: A Little Hyper, but Gets the Job Done
Now the OnError handler is a bit different. It fires once for the current task that failed, once more for each parent object, and finally also at the package level. If a task is nested in a ForEach loop container the OnError handler will fire once for the task failure, once for the ForEach failure when the task returns an error, and one last time for package failure. Usually only the first message gives enough information to be useful, but just to be sure I record them all. In my package template each time the OnError handler fires it does a few things sequentially:
- First it changes the log result type to 3, which is for system failure
- Next it saves the error message to the variable v_SSISPackageLogResultMessage
- Then it appends the error code and message to the v_SSISPackageLogMessageForEmail variable, which will be sent out in an email when the package completes
- Lastly it sends all this information including the SSISPackageLogDetailRowID, if it exists (if a detail row has not been created, …DetailRowID is -1), to the prSSISPackageLogDetailRecordError sproc
The prSSISPackageLogDetailRecordError sproc will then either update the open Detail record with the error, or will record a new detail row with the error information. Recording the error information in this way makes it very easy to track down an error, and figure out exactly what failed.
Next: Package Configurations
Next I’ll show how my template uses package configurations and a package configuration table in the AdminDB to store connection information. This makes it very easy to port your packages between your dev, test, and production environments without having to rebuild the package deployment. ==>
I’ve decided to change my posting frequency to every other week, so be sure to check back on or before Dec. 12th for the next installment of this series.
Example Files
Creating a Solid SSIS ETL Solution: Navigation
Part 1. – Package and Error Logging
Part 1. – Package and Error Logging (cont.)
Part 2. – Package Configurations
Part 3. – Package Template Overview
Part 4. – Email Task and Package Execution Report
SSIS as an ETL solution
SSIS is a very powerful ETL tool, which comes packaged with SQL Server 2005+. It comes packed with many powerful conversion tools and connection types for almost any ETL process. For any DBA or BI professional thinking about using SSIS as their primary ETL solution, a good template and logging/error tracking system is essential to create a solid ETL environment. While SSIS does come pre-packaged with a logging system, it just doesn’t cover all the bases. SSIS also does not come with a basic template.
Before I go any further, all scripts, the package template, RS package execution report, and test data can be found in the associated zip file linked at the end of this post. Before trying to use the files, make sure you run through at least the schema and configuration scripts, else when the package is opened it will error out as it tries to load the package configurations for my personal test system.
Recently I was tasked to start moving data from some flat file downloads my company gets from various vendors from across the country via FTP into specified tables in our database. Having never used SSIS to ETL data, I didn’t have any scripts or templates already built to create a solid ETL solution.
For the next few weeks I’ll be going over the logging system, package template, and package execution report I created to build a solid base for using SSIS as our ETL solution.
Custom Logging/Error Tracking System
The very first thing I wanted out of this system was execution logging and error message/data capture. I did find that SSIS does come packaged with some built in logging, but the logging is static, doesn’t collect all the error information I want, nor does it capture any rows which error out during transformation or loading. It can be very difficult to troubleshoot an automated process if the proper error messages and data which caused the error are not captured. For these reasons I decided to create my own custom SSIS logging solution.
First I needed to set up the schema, which would capture the logging information. The logging associated with all SSIS package executions are captured in the AdminDB database in four simple tables. The database and table drop/create scripts can be found in the SSISPackageLoggingSystemSchema folder. To create the table structure, run the AdminDB database creation script and then run each table creation script in SSMS in the following order:
-
1. SSISPackageLogResultType
2. SSISPackageLog
3. SSISPackageLogDetail
4. SSISPackageLogDetailErrorRecord
Each table performs a specific purpose. The SSISPackageLog table captures every execution of a package on the system. It captures the package name, start and end times, and the general result of the package’s execution. The SSISPackageLogResultType table is a simple list of package result types: success, data loading errors, and system failure (package failure). The SSISPackageLogDetail table records every data flow task execution and it’s details, such as: parent package ID, data flow task name, start and end times, successful row count, business failure row count, system failed row count, and the result of the data flow task (same result types as at the package level). The SSISPackageLogDetailErrorRecord records each row of data which errors out of the ETL process for whatever reason, usually a data type incompatability or out of range issue. It captures parent data flow task ID as well as a string representing the exact row of data that failed the data flow process.
In order to connect these tables with our package template, I created five stored procedures, which can be found in the SSISPackageLoggingSystemProcs folder. There are package log and package log detail start and end sprocs as well as a sproc for recording any package errors.
The sprocs themselves are not too important. How they are used in the SSIS template is.
Starting the logs
Right away when package execution begins, the first task in the package starts the logging process. As you can see in the following screen shot, the package log start task sends the package name and start time as parameters to the SSISPackageLogStart sproc. A record is inserted in the SSISPackageLog table, and the ID of that record is sent back to the package and stored, so the package log end task can update it with the results of execution.

Next up in the logging process is the package log detail start task, which fires off just before any data flow task runs (place a copy of this task before each data flow). As can be seen in the associated image below, this task and sproc are much like the package log start duo from above. This task passes the associated package log row ID, data flow task name, and path to the data source as parameters to the SSISPackageLogDetailStart sproc, which inserts a row into the SSISPackageLogDetail table. The resulting ID is then passed back to the package, which it again will use to update that same record with the results of the data flow task execution.

Recording Data Flow Counts and Logging Error Rows
Now that we’ve got the log records started, the package delves into the data flow, where it contains redirection paths for data records from the source which do not fit into the ETL process or final destination table. As can be seen in the image below, each record which does not fit is converted into a generic string and recorded in the SSISPackageLogDetailErrorRecord table. The error data flow destination records the ID of the current data flow task as well as the erroneous row data string. The basic approach to this error pipe is to union the error strings from any conversion task, and then pass it to the destination table. When you add a conversion task simply add another derived column task, create the error row concatenation in the task, and then add it to the union all task.

If you noticed the data flow task is counting how many successful rows, business failure rows, and system failure rows are passing through the flow. It’s collecting these counts into three package variables: v_SSISPackageLogRowCountSuccesses, v_SSISPackageLogRowCountBusFailures, v_SSISPackageLogRowCountSysFailures. Once the data flow task ends, this information is used to change the data flow task result type and message if any business or ‘system’ failure rows were recorded.
Time to close up shop
After the data flow task and the script task which follows have finished executing, the row counts, data flow task ID, result ID, and result message are sent back to the SSISPackageLogDetail table via the SSISPackageLogDetailEnd procedure, as is shown in the following image. The SSISPackageLogDetailEnd sproc uses this information to update the package log detail record started by the package log detail start task with end time, row counts, result id, and message, effectively closing out the data flow logging process.

Finally once the package has finished archiving and deleting the original source file, the Package Log End task fires. It sends the Package Log ID and package execution result ID to the SSISPackageLog table via the SSISPackageLogEnd sproc, which updates the original record inserted by the Package Log Start task with the end time and result type ID. This closes out the entire logging process, and from here the package sends out an email with execution results.

Next: Logging Errors
Now that the logging schema, start/end process, and data flow error capture is all set up, next I’ll show how I handle and record package errors. ==>
Example Files
Wait…failover cluster? I’m a DBA; not a server guy!
That’s what I said when I started seeing DBA positions open up with a requirement of clustering experience. I didn’t think too much more about it until I started reading about it in Microsoft’s 70-445 training kit on SQL 2005 Business Intelligence. I had a few simple questions about how it worked, namely does the cluster use native disks on the server boxes or a SAN? I asked two of my server buddies, but they didn’t really know for sure, as they have never worked with the clustering service. Looks like another job for Supergoogleman!
Taking a step back – Tiered Distribution
Being a guy who asks ‘why’ or ‘how does it work?’ almost to the point of annoyance (Hey I’m an analyst! Sue me!), I dug really far back into how modern infrastructure got to the point of failover clusters, etc. Sure I have a 4 year Information Systems BS, but it really doesn’t teach you a whole lot about the ‘why’. Additionally since the ‘why’ is not clearly stated, in my experience it takes some real world experience to actually figure out the whole ‘why’ part, and when that happens it’s like a giant lightbulb goes on and you’re saying to yourself, “It’s so simple!” I posted the background work I did on Tiered Architectures in this post.
How many different server cluster types are there?
I found at least four types, but the types we will be looking at in more detail are Load-Balanced Clusters and High-Availability Clusters (or Failover Clusters).
Load-Balanced Clusters

Load-Balanced Cluster on Application Tier
Load-Balanced Clusters are usually implemented on web and/or application tiers. This is because typically a web site or portal’s web pages rarely change during a session and most often application servers are working with static or very similar files. Any of the servers in the cluster can handle a client request, or they can all take a piece of the work.
Load-balancing is a bit outside the scope of this post, which you will see when we talk about Failover Clustering. If you would like to read more on load-balancing, check out this Microsoft best practices page.
Failover Clusters

Failover Cluster
Failover clustering is what SQL Server 2005 and up uses to greatly increase availability. Basically how a failover cluster works is a primary server handles all the database requests, while the failover server(s) sits idle. If the primary server fails, the cluster failsover to one of the failover servers.
How does it know to failover? Well in a nutshell if the primary server goes down for whatever reason, the failover server will notice a lapse in connectivity with the primary server. The failover server then checks with the witness (a witness acts as a third party watchdog for the system) to see if the witness has also lost connectivity with the primary server (hey maybe the failover is the one who’s lost its connectivity with the cluster!). If the witness too has lost connectivity with the primary server, the failover server then takes over processing requests from the application tier.
Why not just use a load-balancer, so failover servers aren’t sitting there idle?
Good question. The reason is if two instances of SQL Server are working with the same data files, you would quickly find your data corrupted and deadlocked as each instance tries to work with the physical database simultaneously.
Now we can answer the original question
Does the cluster use disks native to the server or a SAN?
The answer is either, actually.

Failover Cluster using SAN
The most common setup for SQL Server on a failover cluster is to install it using a SAN. In a 2 node cluster, you would install SQL Server on two duplicate servers, install the witness on one LUN on the SAN and the database files on another LUN. The primary, failover and witness LUN make up the cluster quorum. The quorum desides by vote which is the active server (as described above). Usually this will be the primary, so long as it is working properly and has working connections.

Failover Cluster with Witness
Another option is to use a witness server instead of a SAN. In this setup, you install SQL Server on two duplicate servers just as you would with the SAN setup, except instead of using a LUN to set up the witness, you setup the witness on a third server which is also running the same version of SQL Server. The data files are kept on each server, mirrored using log shipping. The witness does not keep any data or handle any requests by the application tier. It is there only to be a part of the quorum. In this set up, if the primary or failover server go down, the sibling server will begin to save up its logs to ship to the downed server once it comes back up.
The witness server solution is a great solution for businesses which don’t have dedicated SANs or in some cases, for whatever reason, the servers need to be located in two different facilities. You can do the same thing with 2 SANs in different locations, although this is a much more complicated setup.
Why use a failover cluster for SQL Server?
There are many benefits to installing SQL Server on a failover cluster, some of which are:
- High-Availability – If the primary server fails, no downtime will be experienced by the users
- Maintenance – A node can be taken down for maintenance without a lapse in service – This can be extremely helpful in a solution which must be up 24/7
- The failover server can also be your testing environment – This has it serving dual purposes – You can test on the failover server as you normally would in any system, but the test server also now acts as a backup should the production server fail
Conclusion
I’ve learned a lot about using failover clustering with SQL Server. It sounds like a great way to increase availability while offering many other benefits as well. And now I know you can use either a SAN or the native disks to host data in a failover cluster. Whew! Quite a bit of research to answer that question!
I hope this information has been helpful.
Additional Information
Microsoft TechNet: Configuring a two-node failover cluster
Overview of Failover Clustering with Windows Server 2008
Why you should use Microsoft Cluster Service (MSCS)
As I was looking for information on MS Clustering Services ( MSCS ) (Failover Clustering ( WSFC ) in Windows Server 2008) and how it related to the overall picture, I kept digging deeper and deeper into the ‘why’ you would do it this way (cluster servers). I found out the answer lies in Tiered Distribution. Before I could dive into failover clustering, I had to first remember back to my college days about tiered architectures. I did well on the exams, but spitting out answers to a question does not prove an understanding of the subject, the ‘why’ if you will. So in order to tackle my MSCS / WSFC questions as they relate to SQL Server 2005, I had to first make sure I knew ‘why’ best practice infrastructures involve tiers. Here’s what I found out:
Single Tier – Mainframe
 Back in the day when IBM ruled supreme on anything computer, there was basically only one tier: the mainframe. The mainframe handled everything: applications, data, etc. The two main problems with a mainframe is scalability and expense. Mainframes have a physical limit on memory, processing power and disk space. Once you’ve reached the limit, the next expansion will involve buying another mainframe, which brings up the expense issue.
Two-Tiered – Clients and Databases
 The logical progression from the mainframe is to increase scalability by pushing application processing to the client. In this way you can add new machines at small expense and also tweak each user’s machine to their specific needs. Users no longer have to share processing power with everyone else. Drawbacks include the management of these clients: you better hire a ton of desktop guys. Also, you can’t let anyone outside of the company use your system.
Three-Tiered – Clients, Applications, and Databases
 The next evolution in tiered distribution is a compromise between the mainframe ease of having few machines and the scalability of a two-tier distribution. As you can see here, the application work has been brought to a middle tier called the application tier. Users usually make requests of these applications through a thin client, and the web and application servers do the work. This is what stumped me in school, because the difference here was not explained well. You wouldn’t move applications like Word or Excel to the app server because they are single user applications, but you would move applications like PeopleSoft, Remedy or Documentum because these are collaborative effort applications. One of the biggest problems with the three-tier distribution is the application tier is now exposed to external customers, so they can connect to the web servers. Not a great idea.
Four-Tiered – Clients, Web Servers, Applications and Databases
 Ah this looks much better. With the addition of the web server tier, we can now put our web server in the DMZ or perimeter network without exposing our application servers to the outside world. Additionally we can give the two tiers much different set ups. We would give the web server tier more network sockets and I/O while we give the application servers more processing power, which the web servers don’t really need.
Conclusion
Hopefully this makes it very clear as to why tiered distribution is the current norm in a typical infrastructure. It really made it easier for me to understand why you would cluster SQL Server as well as how it actually works. For more in depth information on this subject, check out this Microsoft best practices page on Tiered Distribution.
New Toy!
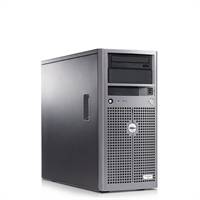 Recently I set up a new Dell PowerEdge 840 server at my house to have a place to learn new technologies and basically mess around. A friend of mine and I installed Windows Server 2008 and SQL Server 2005 including SQL Server Analysis Services ( SSAS ) and SQL Server Reporting Services ( SSRS ). The installations were pretty simple, which was surprising. For now I didn’t want to complicate the SQL installation, so I installed it with only one service account to handle all the services.
Well I made a very newbie mistake by forgetting all the passwords we had set for the windows accounts we set up during installation. Since my friend has a limited number of installations of Server 2008, I had to find a way to either get ahold of the passwords or find a utility to change the passwords. I couldn’t just rebuild from scratch. I found this utility (Offline NT Password & Registry editor), which allowed me to change the account passwords via a boot disk.
Wow! That was easy
Everything is gravy right? Wrong! It turns out to change the service account information for SSRS you must first backup the key used to create the encryption SSRS uses because you need to restore the key to change the service account info. Well I had changed the service account’s password hash on the disk and so never had a chance to create the backup key. All of the account information was now locked into the encryption.
Some uninstallations were in order. I uninstalled and reinstalled SSRS, but it didn’t solve my problem. The uninstaller didn’t remove the SSRS instance files from the drive. When I reinstalled SSRS, all of the connection information was still intact. I also uninstalled and reinstalled IIS, but the SSRS application information and virtual folders were still intact. I had to get a lot more medival. To make a long story short, here’s the list of what I did to clean up the server:
Google powers, activate!
- Completely uninstalled SQL 2005
- Deleted both the 64bit and 32bit SQL folders on C:\
- Noticed the SSRS service (ReportServer$SQL2005) was still on the machine with the account credentials I had given it the first time around – Used sc.exe to remove it
- Ran C:\>SC.EXE query | find /i “SERVICE_NAME: SQL” to locate any other SQL services I and the uninstaller missed
- Removed the SQL instance registry keys
- Deleted the residual SSRS server application information and application pools from IIS
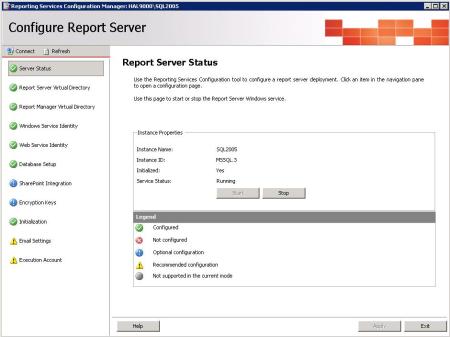
All of this work created a nice, clean server once more. I then reinstalled SQL 2005, including all components. During the first installation, my friend and I installed some additional IIS 7.0 role services In order for SSRS to function correctly. I couldn’t remember what they were, but my google powers found this gem of a list. Additional IIS role services installed, I then ran SQL Server 2005 SP3 (most importantly for this post, it corrects some bugs with SSRS configuration manager). I then promptly opened the SSRS configuration manager. Low and behold, everything was fixed!
Onward with discovery
I hope this article can shed some light on how to fix a bad install of SS Reporting Services 2005. I know I had a hell of a time finding help with troubleshooting. It seems every work on how to install and configure SSRS assumes each step is automatically successful. It would be nice if they also added some notes on what to do if the step does NOT install or configure as expected.
Now it’s time to dig in deeper to this thing called Reporting Services….
