THE MASK

April 22, 2010

What I know about Mask?

According to this unit, we learn about mask. For  my basic knowledge about mask before begin the unit deeply, mask is a material that express our characteristics and feelings. Our mask should represents our self and our characteristics. Mask usually use in a play with each different characters. When we wear masks, the audiences need know who are we and what are our main characteristics. Mask is a very great tool for performing and acting. Below will be my research about mask. I will decide which type of mask I will create. I only know that there are several various types of masks, but I do not know deeply yet. As my research, I will search one of my favorite type of mask that I will create.

How to make a Papier-Mache?

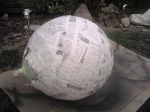
According to my research, I had watched a very good video in youtube of how to make a Papier-Mache mask. The materials that will be needed are Table Cloth, Smock, Plastic Gallon Jug, Strong Scissors, Craft Knife, Elastic Band, Newspaper, White Computer Paper, Flour or Glue, Acrylic Paint, and Decorations.

Step 1: Cut the plastic jug in half. The half of the plastic jug will be the face.

Step 2: Cut two small holes on each side of a mask for eyes and cut a big hole at the bottom for mouth.

Step 3: Cut out bits of Newspaper, and prepare for pasting on the mask. (3 layers)

Step 4: Prepare another 1 layer of computer paper.

Step 5: 2 cups of flour and 1 cup of water into the plate. Or use glue with water.

Step 6: Dip Newspaper into a plate, then stick it onto a mask.

Step 7: Pasting 3 layers as Newspaper and last layer as computer paper.

Step 8: When the mask is dried, paint it.

Step 9: Wait until it is completely dried, and finish.

Youtube Video Papier-Mache

Individual Mask Project

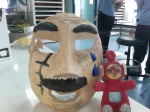
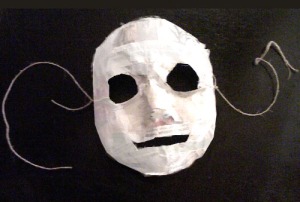
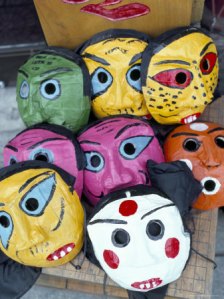
For my mask, it represented one character of british person who was in the age of English Civil War. His age was 40. He got wrinkles under his eyes and a long scar over his face.  His wrinkles under his eyes occurred because he had never fully slept along the night. He needed to be careful and active all the time for avoiding been killed by the enemies. He got long scar over his face from being attacked by the bloody knife. Moreover, he got tears in his eyes because he lost his family and friends during the war. He also needed to stay alone all day and night without anyone he knew.

According to my mask, I used elements of texture for the long scar and wrinkles around the face. In order to make texture more unique, I used the technique of clay to make different levels of surface on the long scar. For the wrinkles at forehead and eyes, I made the paper to be crinkled and folded. When we touched, we would feel like the real wrinkles of human skin. In this project, I also used the elements of color and tone by mixing the primary color together and making different shades of color on the mask. Moreover, I used color and tone to make the long scar more prominent by mixing the color of gray, black and brown together. Mostly in the mask, I used hot color to express the feeling of painful and fearful during the war. I also used cold color to make the mask looks more interesting. However, the cold color that I used did not change the feeling of my character because blue tears represented the feeling of sadness and desperateness.
Thai blog link

November 30, 2009

http://blog.kis.ac.th/purigun


IT Blog link

November 30, 2009

http://203.148.253.29/purigunrukkhat


Sea Sculpture

October 13, 2009

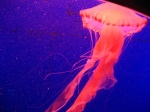
I have started the new unit, “Sea Sculpture”. The materials that I built a sea sculpture onto is called “armature”. I went to Siam Ocean World with my school and I chose one sea creature. I decided to do a jelly fish as my sea sculpture. I chose jelly fish because I thought that it would be nice and interesting to do it. When the project was done, I would get an one nice jelly fish. This jelly fish came from the ocean. It was red and had long body. It was very nice and interesting. This work would take me a long time to do it. Maybe it took me for many weeks. When I saw this jelly fish, I thought that what materials should I created it, maybe ropes and something else. But I knew that they should be the recycle materials. I worked hardly to find the materials. First, I decided to do a sting ray, then I changed my mind to do a jelly fish because the materials of jelly fish could find more easily. And another reason I chose to do jelly fish because I did not see any people created jelly fish in G7B, which is my class. They created string ray and some other weird fishes. Also, some people created sharks, which are very interesting. Actually I liked shark, but I could not find the materials for it, so I decided clearly to create a jelly fish.

1456777479_44b036a8ae 565246_jellyfish red-jellyfish


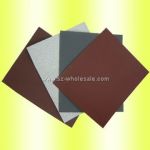
According to the first paragraph, I chose jelly fish to be my sea sculpture. I tried hardly to find the materials. I tried to plan for many days and at last, I knew what materials should I chose. First, I missed the concept of environments. I created a Jelly Fish with no recycle materials. This was a major problem. So I needed to create a new one. Before I start created a new jelly fish, I prepared the materials first.  I used the ropes to create the tentacles of the jelly fish. I used around 40 ropes to build its tentacles. In the middle of the tentacles, there will be a sand paper folded and scrambled like in the pictures. The colors of the jelly fish will be hot tone, actually red, yellow and orange.  The size of the ropes were not big. They were small, long and thin. And they will be bend. The first materials that I created the sea sculpture was bottles and long ropes. I put the bottles around the ropes and make it as a circle. I used a balloon and sticked it on top of the jelly fish. Then connected them by newspapers. When it was kind of a shape, I put the brown paper and glued it all over the jelly fish. Then I connected them with the sand papers to be a big tentacles and the ropes to be a long short tentacles. When it was well done, I painted it with the technique of hot tone colors. When it was well dried, it would be excellent. The difficulty would be around 8/10. The challenges that might happen to me when I still doing this work was the colors will be empty before I finished the sculpture. This problem made me worried. So, I thought that this work would be quite challenge. If this problem happened when I created the sculpture, I would have to fix the problem myself. I would bring my colors from home to school. This problem could cause lots of my time. I needed to prepare my colors at my home first because if there was an emergency about the colors, it would waste just a bit of my time, so my quality of work would be better. I hoped that this project should contains solved problems and enjoyment.


____________________________________________________________________________________________________________


One Point Perspective Reflection

September 23, 2009

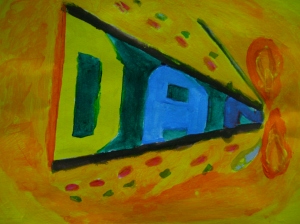
In class, we did our Name Tag with a technique called,One Point Perspective”. First, we drew the grid lines. Second, we drew them like big

lines to small lines. Third, we drew our letters name in the boxes. Finally, we got the One Point Perspective Name Tag.  A good One Point

Perspective Name Tag had to end at a Vanishing Point. I thought that I done well at One Point Perspective Name Tag because my ending of

everything in the card were at Vanishing Point. I scored my work was well. I evaluated my work 9/10.

DSC00990

One point perspective

August 13, 2009

One Point Perspective

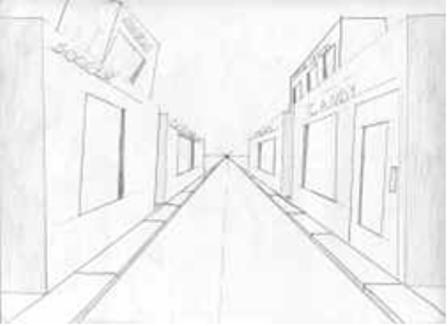
1 Definition: One point perspective is a picture which include parallel lines, represent the illusion of depth and distance.

2 Definition: All parallel lines converge at a single point on the eye level or on the horizon.

How to create One point perspective work

First, you create the flat side of the object.

Then, all of the receding lines must be converge to one vanishing point which is directly across from your station point.

One Point Perspective art can be drawn just easy as lines, or can be drawn just hard as deapth and distance color picture. We might need to start at basic, draw easy lines first, until we move on to the real hard one. One Point Perspective is a very interesting art work because it shows the deapth and distance very well.

Vertical line

Definition: A straight line on the coordinate plane where a lot of points on the line have the same x-coordinate.
Vanishing Point
Definition: The point in linear perspective at which a lot of imaginary lines of perspective converge.
Examples….       This is a picture of a city!!!!

1_point_perspective

This is a picture of a building!!!!120px-Perspectivephoto

Hello world!

December 4, 2008

Welcome to WordPress.com. This is your first post. Edit or delete it and start blogging!