\”The Entity Bean is on vacation.\”

February 12, 2016

Jai Hind!

Filed under: General — Tags: , — Gautam Satpathy @ 11:23 am

To a kind Hearted Christian Friend…

Gods – Jai Hind!

Thank you for that message on WhatsApp from the US Army. I will not send it on because it is not from the Indian Army – the army because of which we sleep peacefully in our bed while they die on Siachen and other battlefields. 

Jai Hind!

I am still upset about losing the lone survivor of that Avalanche in Siachen. What a waste!

Jai Hind!

May our nation of many people – Hindu, Christian, Muslim, Buddhist, and others, live long and be prosperous “together”.

Together. We are the last bastion of reason in this embattled world tearing itself apart based on religion.

What does it matter if it is one God against another? They are all Gods!

Being a Hindu brings that into perspective! Gods. Not A God.

That is when the conflicts started – when people started saying that “My God” is greater than “Yours”.

For a Hindu, All Gods are Great!

So, where is the conflict?

Be Hindu… All Gods are Great! All!

Jai Hind!

March 18, 2006

Apache ANT – An Introduction And A Few Tips & Tricks

Filed under: Apache Ant, General, How-Tos — Gautam Satpathy @ 1:55 am

Apache Ant Logo

Apache Ant is currently in version 1.6.5 (released on June 2, 2005). I have used Ant since the 1.1.x days and I must say that I fell in love with Ant the day I first downloaded and played with it. And the love endures till this day I remember voting for the official Ant logo in August/September 2001. See the post by Christoph Wilhelms about the vote. And the voting results here. I was a part of the ant-user & ant-dev mailing lists at that time and I had voted for the logo that won!!!

Anyway, enough nostalgia. Lets talk about Ant…

What is Ant?

First of all, what is Ant? As the Ant developers say – Ant is a Java-based build tool. Okay. So what you say? Well, Ant is a tool that makes it possible to do routine stuff in a easy, repeatable, & robust way. Once you have mastered the Ant concepts, how to write Ant scripts (XML files) and how to make use of the power of Ant, you will be left wondering how you managed all those tasks before Ant came along! In fact, I use Ant for a variety of tasks, over and above the software development related tasks that it is meant for. For example, I use Ant to generate a search index for this blog and FTP it to the server everytime I make a post. I use Ant programatically (no build.xml file) in a lot of my programs where I need common functions like file copy, ftp, etc. Why reinvent the wheel when Ant is available?

Installing & Using Ant

Installing Ant is a breeze. Just download the latest binaries from the Ant web site. You should download the ZIP archive. Unzip the archive to a convenient folder (I use D:\Java\apache-ant-1.6.5). You will end up with a folder like in the screen shot below:

Apace Ant - Folder Structure

Figure 1. Apache Ant – Folder Structure

Note that I have highlighted the bin folder. This has MS Dos Batch files that you can use to run Ant. We dn’t have to worry about the batch files and the commands they contain at this time. I will go over some of that stuff in a later post because there are a couple of points that relate to extending Ant with third party Ant Tasks etc.

To run Ant, we need to do two things:

  • Set the ANT_HOME Environment Variable – This will point to the root folder of your Ant installation. D:\Java\apache-ant-1.6.5 in the case of the screen shot above.
  • Add the Ant BIN folder to the System Path – Add the BIN folder to you path. D:\Java\apache-ant-1.6.5\bin in the case of the screen shot above.

That’s all you need to do to get Ant installed and running.

To test your Ant installation, open a MS-DOS command prompt, change to any folder of your choice (say D:\) and type ant.bat.You will see something like the stuff below (figure 2).

Apache Ant - The First Test Run

Figure 2. Apache Ant – The First Test Run

This proves that Ant has been properly installed and all the settings we need are in place. We can now test Ant with a simple build file (we will cover build files in more detail in subsequent posts).

A Simple Build File:

Lets write a simple build file and test our Ant installation. At this time, just download this file (right click and select Save As) and save it into a suitable folder (say D:\AntTest\). Open a MS Dos command window and change into the folder in which you placed the build.xml file (say d:\AntTest\). Type ant -verbose in the command prompt. You should see something like the screen shot below:

Apache Ant - The First Test Results

Figure 3. Apache Ant – First Run Results

Okay, what did we do here? First of all we told Ant to delete the classes folder under the root folder (D:\AntTest\ in this case). Note that the classes folder did not exist at this time. However Ant can handle situations like that! Next we tell Ant to create a new classes folder under the root folder. After that we told Ant to copy our build file, build.xml, from the root folder to the classes folder. That’s it! Short and sweet but it demonstrates that our Ant installation works.

The screen shot below shows the D:\AntTest\ folder contents after the test run.

Apache Ant - Test folder contents after first test run

Figure 4. Apache Ant – Test folder contents after first test run

Well, we now have a working Apache Ant installation and have actually executed a build using Ant. Next we will look at some Ant concepts and how to write good build files.

NEXT – Ant Concepts, Build Files.

March 17, 2006

HOW-TO : Installing Apache Tomcat 5.5

Filed under: How-Tos, Tomcat — Gautam Satpathy @ 10:51 pm

Apache Tomcat is probably the best J2EE server to use for learning and as a testbed. It is small, fast, robust and most importantly easy to manage. I have used Tomcat since the 3.0 days and thought I would share a few things as a set of How-Tos/Tutorials/Notes.

Tomcat has now matured and moved out of the Jakarta umbrella. It has it’s own project web site at http://tomcat.apache.org. At this writing the last milestone release of the Tomcat 5.5.x series is 5.5.16. We will use this version as our base for this discussion.

Downloading & Installation:

The first thing to do is to download Tomcat. Tomcat binaries come in a number of packaging flavors The Windows Installer package is the most convenient You will find the download page links on the Tomcat home page. You will also need the 1.5 JDK from Sun.

To install Tomcat, execute the downloaded file. I suggest you pick the Full option in the Choose Components installer screen. This will dump everything, including examples and sample web applications.

Tomcat Installation - Choose Components

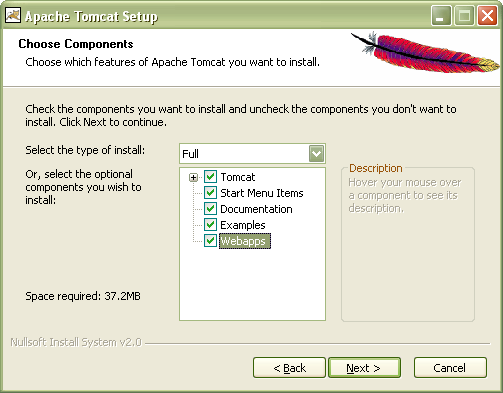
Figure 1. Tomcat Installation – Choose Components

The installer will now prompt you for the disk location. I suggest you select something simpler than the default (C:\Program Files\Apache Software Foundation\Tomcat 5.5). D:\Tomcat5.5 will do just fine and will be easier to handle latter when we write ANT scripts to manage Tomcat and deploy web apps into it.

Tomcat Installation - Choose Install Location

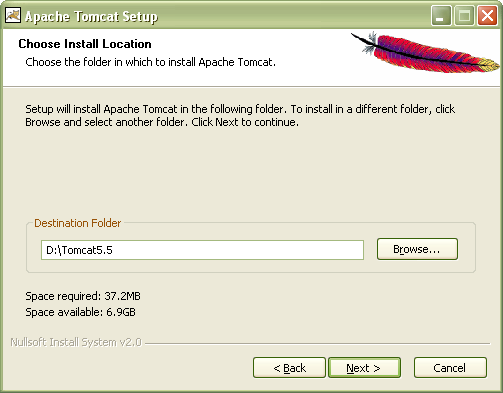
Figure 2. Tomcat Installation – Choose Install Location

On the next screen you need to provide some configuration information. Note that these are important. You should make a note of what you enter here. However, do note that all of these can be changed later by modifying the Tomcat configuration files.

Tomcat Installation - Configuration

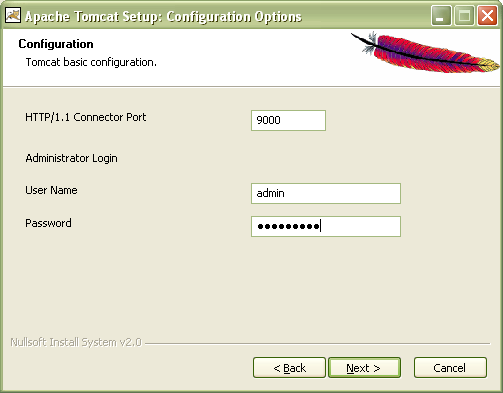
Figure 3. Tomcat Installation – Configuration

The last step before the installation starts is to specify the JDK Tomcat will use. NOTE: It is very important that you specify a JDK installation and NOT a JRE installation in this step. Tomcat will not work with a JRE. It needs access to the compilation and other tools that are available only in the JDK. Most probably the installer will pick your JRE installation. Remember to change it to your JDK installation. Also note that you will need JDK 1.5.

Tomcat Installation - JVM Selection

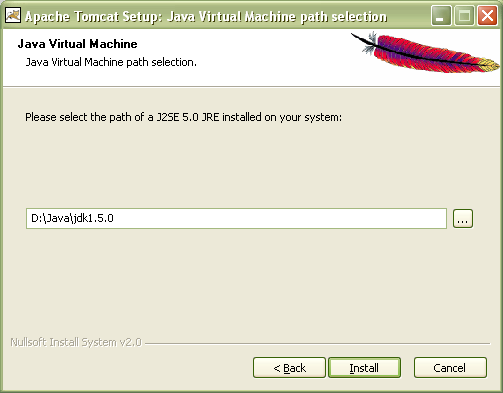
Figure 4. Tomcat Installation – JVM Selection

Now you are ready to complete the installation. Click the Install button to start.

During the installation, the Tomcat Windows Service will be installed. We will come back to that in a little while. After the installation you will get the following top level forder structure.

Tomcat 5.5 Folder Structure.

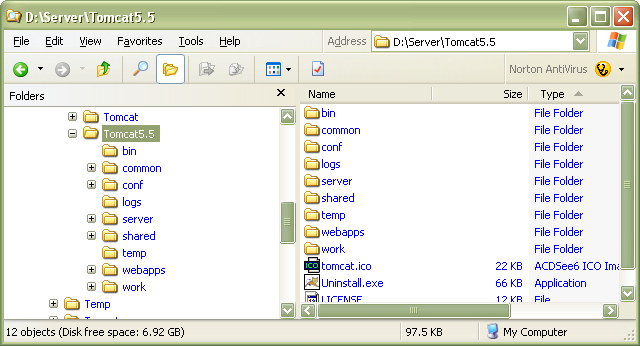
Figure 5. Tomcat 5.5 Folder Structure.

This structure looks similar to the Tomcat 4.x structure but there are many differences deeper down. A lot of things have been simplified.

Note that you will have to keep stopping and restarting your Tomcat server many times during the day. This means the Tomcat Windows Service is more of a pain than help. I suggest you change the service setting to Manual from the default Automatic Startup Type.

Tomcat Windows Service Properties

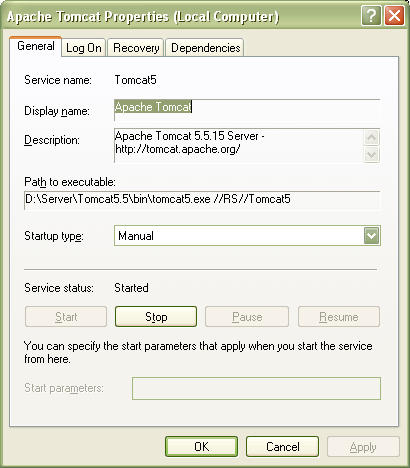
Figure 6. Tomcat Windows Service Properties

Tomcat 5.5 has another neat feature. A Tray server monitor program!

Tomcat Monitor Tray Icon

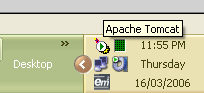
Figure 7. Tomcat Monitor Tray Icon

Tomcat Monitor Popup Menu

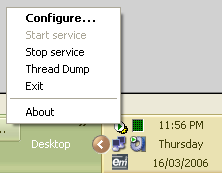
Figure 8. Tomcat Monitor Popup Menu

You can control the Tomcat service from the Configure menu item. This brings up the Apache Tomcat Propertes Screen in which you can control a whole host of stuff like the service startup type, Log level & folder, the JVM, classpath & Java command line options, startup & shutdown settings.

Tomcat Configuration Screen

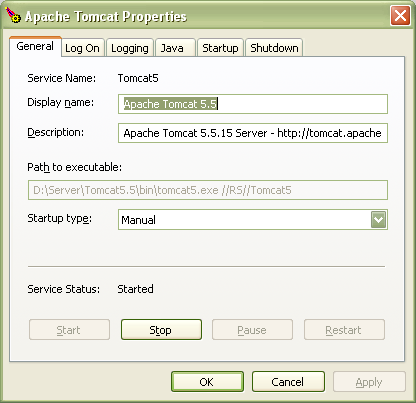
Figure 9. Tomcat Configuration Screen

As you can see, changing the startup type to Manual actually helps us. We have this nifty little server monitor program that runs in the tray. As a result starting & stopping the server is a snap!

Running for the First Time:

Now it is time to fire up Tomcat for the first time. Use the Tomcat Monitor to start the server instance. Then use your favorite browser (Firefox of course!) and point it to http://localhost:9000/.Change the port to whatever you spcified above. You should see the page in the screen shot below:

Tomcat Default Page

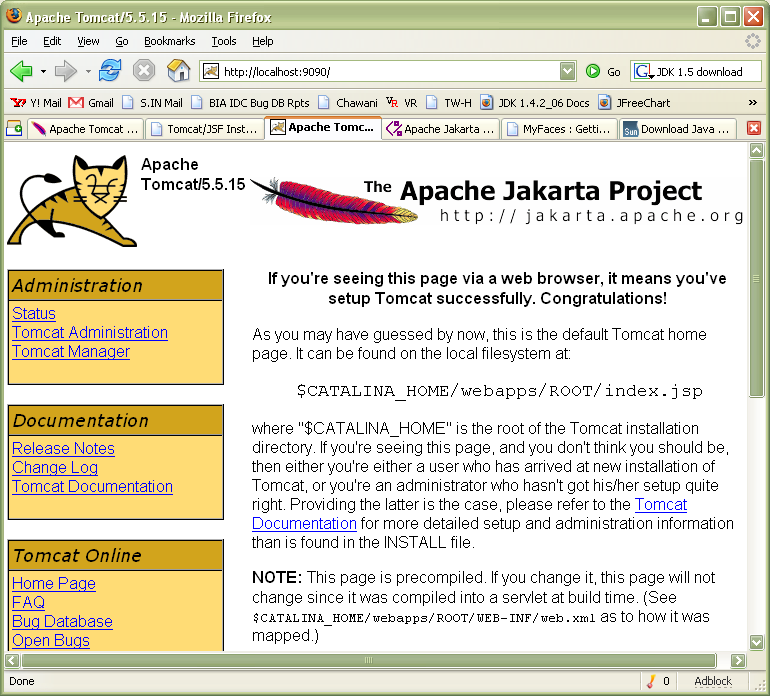
Figure 10. Tomcat Default Page

Congratulations! You now have a working Tomcat 5.5 installation!

Play around with the various examples etc. We will cover Tomcat Server Configuration, Administration and Management next.

NEXT : Tomcat Configuration (Server.xml, Contexts & Logging)

JSF Resources

Filed under: General — Gautam Satpathy @ 8:10 pm

James Holmes has a great page with tons of JSF resources. Check it out!

Another Struts Link

Filed under: General, J2EE — Gautam Satpathy @ 7:00 pm

What is Struts – An article by Chuck Cavaness from OnJava.com – Slightly dated but good nontheless. A all-in-one printable page version of this article.

Struts – A Few Links

Filed under: General, J2EE — Gautam Satpathy @ 6:34 pm

This post contains a few Struts related links. Keep checking back for updates.

That’s it for now. Will add more recommendations as time permits.

J2EE Articles, How-Tos, Tutorials & Notes

Filed under: General — Gautam Satpathy @ 12:30 am

I am planning to write a series of articles about J2EE technologies & tools. These will be in the form of How-Tos, Tutorials, Notes, Tips & Tricks etc. I plan to cover the following in the next week or so:

  • Apache Tomcat – Installation, Management, Administration, Deployment, Tips & Tricks.
  • Apache ANT – Tutorials on ANT Scripting, Tips & Tricks
  • Apache Struts – Tutorials, Notes, Trips & tricks
  • Misc Tools/APIs like Log4J, Java Logging API, JUnit: Tutorials, Notes, Tips & Tricks.

If you would like to see any other topic covered here in the next week or so, please add a comment.

Blog at WordPress.com.