SSD preventing system from booting Windows 10, even from DVD/USB, throws Kmode Exception Not Handled BSOD

April 18, 2022

Last night I launched the upgrade to Win 10 21H2 and went to bed. I was warned it would take some time and everything would be fine, don’t worry but when I returned to the computer it would not boot anymore, instead I had a nice Blue Screen Of Death with an interesting error message : Kmode Exception Not Handled and QR Code to “show support”.

“Not to worry, I’ll just reboot and relaunch the update”, I thought to myself. Well, not this time….

Not only would the OS not load but there was no way I could get into the recovery partition , so no safe-mode, worse, I could not even boot off USB or DVD : the blue screen came back all the time ! The only option available to me was to get into the BIOS.

I spend hours trying to understand what the problem was :

. launching “optimized BIOS” settings

. removing all external USB equipment and booting only with the keyboard attached

. checking the memory modules

. checking the video card

. checking the CPU

. clearing the CMOS

. re-flashing the BIOS

No matter what I did, Windows just would not launch.

After a while I thought there might be a physical problem on the SSD. So I removed the harddisk and installed it onto another working computer as a separate disk… Oopsy, the dreaded blue screen with the useful “Kmode Exception Not Handled” message came back. I removed the SSD and the other computer would boot normally.

I found that the only way I was able to access my SSD content was to use my external docking station

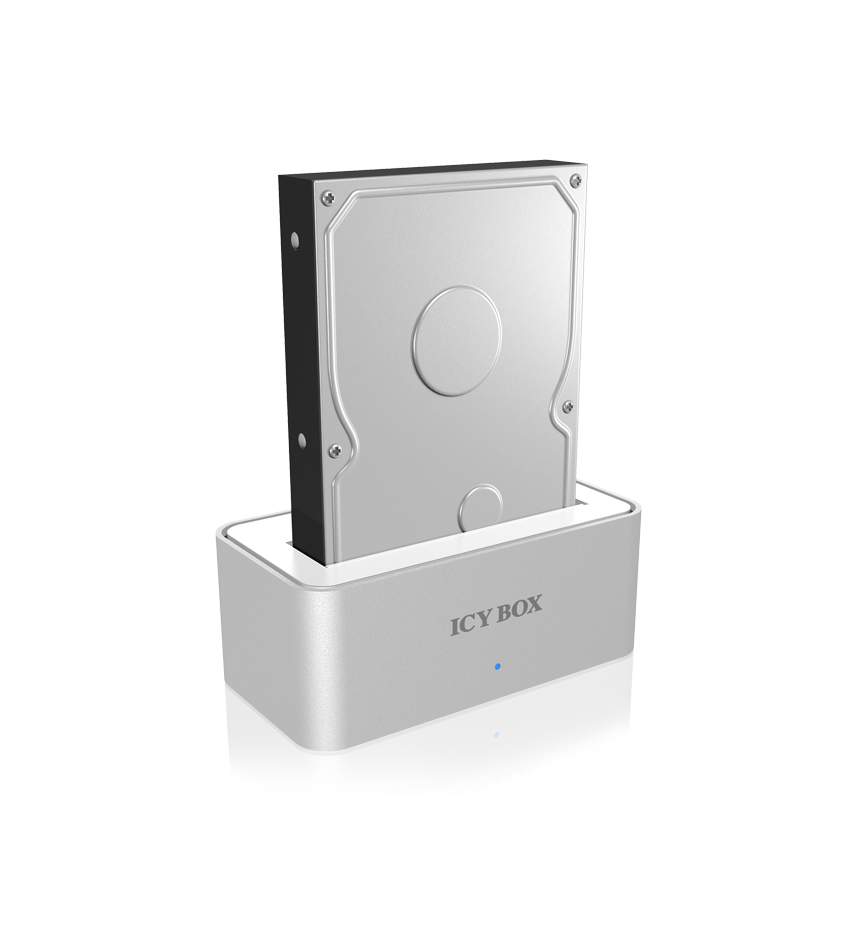
on my working machine but only plugging it after the machine had already booted ! If I left the docking station on during the boot process, the blue screen would be back. Incredible.

So clearly there was something really nasty going on with that disk but what ? Was there a hardware fault preventing it from booting ? Was it failing ? I always thought that with SSDs a failure would impact the whole disk (unlike the old days of disk platters) and it was more of “either it works or it doesn’t” but I did not want to take any chance. So when I realized I could access the content, I created a sector-by-sector backup of the disk onto another SSD using a cloning software (https://www.macrium.com/reflectfree in my case). Then I ran some diags on the disk, tried to access some files and everything seemed to be fine.

As an experiment I plugged the cloned disk onto my failing computer and …. the Blue Screen was back !

So I started reading a little bit about the Windows 10 boot process and realized that since I was using UEFI the problem was certainly that the Master Boot Record got corrupted somehow (by the windows update process ???). So as a last chance before reinstalling the OS I thought I’d give the “fix-it” option a try….and it worked. This is what I did :

  1. Locate and remove the EFI partition on my non-working SSD by following this guide : https://www.easeus.com/partition-master/delete-efi-system-partition.html
  2. Create a Windows installable USB by
  3. Boot the computer using the USB installation media.
  4. On the first screen, press SHIFT+F10 to bring up the command prompt.
  5. Run the following commands at the command prompt.
    • diskpart
    • list disk
    • select disk # Note: Select the disk where you want to add the EFI System partition.
    • list partition
    • select partition # Note: Select the Windows OS partition (# number)
    • create partition efi size=100
    • format quick fs=fat32
    • assign letter=s Note: you will need this letter in the last step
    • list partition
    • list volume Note: write down the volume letter where the Windows OS is installed, you will need it in the last step
    • exit
    • bcdboot X:\windows/s S: /f UEFI  Note : Replace “X” with the volume letter of the Windows OS partition that you wrote down above

And… it worked ! I reinstalled the SSD in my computer and everything was fine after that.

I relaunched the 20H1 update and this time it went through. A shame I lost a day in the process….


Windows 10 Creator version update woes – Media Creation Tool stuck at 33%

April 29, 2017

Another year, another Windows 10 update.

<Humor start>Microsoft : you won ! I drank your Kool-aid, I’m onboard, I want my system to be up-to-date, I need my systems to always be up-to-date. Give me my fix ! 😉 <Humor end>

But, why, oh why must it be always so difficult ?! I’ve been trying to install that Creator Update countless of times since last week and I only just got it right it today. In the process I learned much more that I wanted to in the Windows update debugging process.

Here is what I did after several attemps of launching the upgrade and having the whole process stop and get stuck at 35% several times.

To make a long story short, don’t use the regular path to update (Start / Settings / Update & Security / Windows Update) but go the Media Creation Tool way (https://www.microsoft.com/en-us/software-download/windows10). This will download the Windows update source files and put them on a USB drive so that you don’t have to redownload them everytime there’s an error or another during the update process. After the 5th update retry you’ll be glad you did : the upgrade files total 3.5 GB and on my (crappy) connexion it took 5 hours to download from their servers.

Before you do that though make sure that the original Windows language is restored to the default option. Windows 10 allows you to install language pack and use pretty much any language for its display and menus. For example if you are in France but you prefer to use an English version of Windows 10 you can do so (Setting / Time&Languages / Region&Language / Add a language / Set as Default / make sure it is set as “Windows display language” – reboot a few times and you’re set).  This is a great option and a welcome plus in comparison to Windows 7 where this was only possible in their PRO version (I have a Home Edition). I really don’t understand why Microsoft blocked this in previous Windows versions. It is simply ridiculous to force people to use a specific language and not include English. Anyway…

What I noticed however, was every time a major Windows 10 upgrade comes along they WILL fail unless the original language Windows was sold in is restored.

Once the USB key is created, restart in minimal config mode (MSConfig – Diagnostic startup), unplug any USB device , launch the Setup from the USB key, choose NOT to download the updates, and if you use a Logitech dongle for their wireless mice and keyboards (Unify system) : REMOVE IT ! and wait…. Process should take 1 hour – 1 hour 15 in total. Process should not stop and not get stuck at any point for 15 mns or longer (for example 35%….).

Here is the detailed step by step procedure. I found that every step was important for my system to be able to get upgraded :

  1. Have an 8GB USB key handy
  2. Remove any optional language pack (Setting / Time&Languages / Region&Language)
  3. Reboot a few times until the original language is used for menus and such
  4. Install the Media Creation Tool (https://www.microsoft.com/en-us/software-download/windows10).
  5. Launch the program
  6. Wait a couple of hours for the files to download
  7. Once the USB key is ready you will prepare the system to reboot in “minimal config”
  8. Launch MSCONFIG and check “Diagnostic startup”
  9. Choose Apply
  10. Unplug every USB device but keep the Logitech Unify dongle for now as you need the mouse to navigate the menus
  11. Reboot
  12. Launch the Setup file from the USB key
  13. Choose NOT to download updated files
  14. Let the tool run
  15. The machine will reboot several time on its own.
  16. After 1h00 – 1h15 process should be done.
  17. Replug the USB devices (including the Logitech Unify if using it)
  18. Launch Windows Update to make sure the system is clean
  19. Reboot if needed
  20. Reinstall the optional language pack if using

Good luck.


Opting out of Google Cars drive-by wifi snatch AND Microsoft’s Windows 10 Wifi Sense at the same time

September 10, 2016

To opt out of Google worldwide wifi collection you must add _nomap at the end of your wifi SSID

To do the same for Microsoft Wifi sense your wifi SSID must contain _optout somewhere.

So if your current wifi SSID is mysuperhomewifi it is highly recommended you change it to mysuperhomewifi_optout_nomap

Now, I hope there won’t be another “friendly” provider that will require its optingout string at the end of the SSID…

More info here :

https://support.google.com/nexus/answer/1725632?hl=en&rd=1

https://privacy.microsoft.com/en-US/windows-10-about-wifi-sense


Only show unread mail in the primary inbox from Gmail

August 9, 2016

category:primary is:unread


Handbrake settings how-to guide

May 5, 2016

Very detailed, clear and concise guide on the various options available in Handbrake when converting a DVD/BlueRay to MKV file :

https://mattgadient.com/2013/06/12/a-best-settings-guide-for-handbrake-0-9-9/


My settings :

Video Codec : H.264
Video : CQ (20)
Variable Framerate
Encore options : Tune (Film), Profile (Main), Level (4.0)
Picture settings Filters : Detelecine (Default) / Decomb (Default) / Denoise (Off) / Deblock (Off)
Picture settings Size : Anamorphic (Strict) / Cropping (Automatic)


GodMode in Windows 10

January 17, 2016

In order to access all the settings and configurations in Windows 10 in one place, create a folder and rename it GodMode.{ED7BA470-8E54-465E-825C-99712043E01C}

Then, simply double-click it and feel like a Windows God


Sonos configuration options

April 13, 2015

I have a couple of Sonos products that I chose to replace my ageing wireless hifi configuration (see Synology DS Audio and JBL Wireless speakers). The primary driver was the Room feature allowing me to link Sonos speakers together and have them play the same music : when I throw a party, it’s great to have a musical continuity everywhere in the house, from the garden to the kitchen.

The engineers at Sonos have done a superb job of making the setup completely flawless and super easy. However as it is often the case what you get in user experience you sacrifice in flexibility (any resemblance to a real company, living or dead, is purely coincidental. I am not talking about Apple 😉 ).

So it was a real pleasure to see that they created user-accessible hooks to their hardware so that we can control a lot of the settings by simply issuing HTTP requests to the various devices.

Benoit Steiner wrote 2 great posts listing a lot of the options accessible through the Web APIs.

Both are must read for anyone inclined to (re)gain control of their Sonos components :

http://bsteiner.info/articles/hidden-sonos-interface

http://bsteiner.info/articles/disabling-sonos-wifi


Have a look at the wealth of info you can obtain here (replace sonos_ip with the IP address of any of your Sonos gear) :

http://<sonos_ip>:1400/support/review


I immediately disabled the wifi on those of my speakers that are only connected through wired ethernet : http://<sonos_ip>:1400/wifictrl?wifi=persist-off

Here’s the command to put the wifi back on : http://<sonos_ip>:1400/wifictrl?wifi=on


Asus RT-AC66U router and Tomato

September 21, 2014

I’ll write a longer post sometime but as a reference I flashed my Asus RT-AC66U router with the Shibby mod of the great Tomato firmware project. This allows me to use lots of very nice features not available from the stock firmware.

I downloaded the firmware from : http://tomato.groov.pl/download/K26RT-AC/

I chose the newest directory (121-en at time of this writing) and in there chose the AIO (All In One) version of the file : tomato-RT-AC66U_RT-AC6x–121-AIO-64K

Update April 2015. I just upgraded to the latest release and it worked like a charm. I simply downloaded the version from the newest directory (128-EN) and chose the upgrade option from the menu : http://router-ip-address/admin-upgrade.asp.

A really well-done implementation !

On top of that Shibby is super reactive on the linksysinfo forum and answers most of the questions users ask : http://www.linksysinfo.org/index.php?threads/tomato-shibbys-releases.33858/

This is such a great example of the superiority of opensource software : we do live in great times, long live the share economy !!

Update September 2016: I once again upgraded following the procedure and it worked great.
This time however I wanted to erase the NVRAM so that I could reclaim some of the memory as only 4% was left available.
I used the following commands to capture the settings I did not want to re-enter by hand (go to Tools / System commands and copy-paste the results in Notepad for example) :

  • QOS Settings : nvram export –set | grep qos
  • Access restrictions : nvram export –set | grep rrule
  • DHCP Rules : nvram export –set | grep dhcpd

Then once the upgrade was finished I restored the settings using the reverse commands :

  • nvram set qos
  • nvram set rrule
  • nvram set dhcpd

I finished with a NVRAM COMMIT

Lots of great info on this on http://www.linksysinfo.org/index.php?threads/using-qos-tutorial-and-discussion.28349/page-3#post-138676
Great, great stuff….


How to avoid stuttering when listening to online radio thru Synology and USB speaker

February 2, 2014

I use a Synology DS213 server as my main multimedia box. It holds all of my music, videos and naturally I use it also to stream online radios. I have a USB Speaker plugged into the NAS and hooked up to my AV receiver.

I decided to subscribe to the excellent TraxxFM feed (http://www.traxx.fm) after having tested their free offer. The subscription brings 20+ channels of excellent curated music. They have everything from Classic to Rap, Deep, Classic Hits, Trance etc. Enough to satisfy the various moods I may be in during the course of a day. Anyway, something interested happened when I switched from free to paid radio : the streams were all in better quality and with no ad but after 20 mns or so of streaming, the sound would start to stutter, stopping for a few milliseconds and restart again. It quickly became super annoying and nearly made me regret the free offer which didn’t suffer from this.

First I thought it had to do with my Internet bandwidth being shared by a download or someone watching YouTube or a general network issue. So I made sure my QoS settings were correct and that the online traffic for the radio was correctly prioritised : it was. The strange thing was that the stuttering occured after 20 mns or so of streaming, sometimes more but never less than 20 mns. It seemed like the Synology couldn’t keep track of the amount of network traffic that Traxx was sending, but I looked at the various stats in the control panel everything was normal (DSM up-to-date, no overheating, LAN ok,…).

I Googled far and wide but nothing… nobody reported anything similar. I nearly gave up and even thought of dedicating an old Android phone to Traxx streaming until I decided to check every single setting available in the Synology control panel and stumbled upon the Hardware option. In there there’s and HDD Hibernation setting that was set to… 20 mns ! Hmmm…. interesting. There’s another option underneath : “enable advanced HDD hibernation to minimize power consumption” which was checked. I changed it the Hibernation time to 5 hours and unchecked “Enable Advanced HDD….”. I launched Traxx FM and this did it ! No more stuttering and lag !

I confirmed this by reenabling both settings and setting the Hibernation to 10 mns and… the stuttering reappeared.


Convert a MiniSIM (used in an iPhone 4s) to a NanoSIM (used in an iPhone 5s)

December 25, 2013

Recently bought an iPhone 5s as a replacement for my ageing iPhone 4 and was shocked to discover that I needed to fork out 40 swiss for a new SIM. The new phones use what is called a NanoSIM whereas the iPhone 4 use a MiniSIM. The only difference between the two is the size. I knew there had to be a better way and a little Google got me there : https://dl.dropboxusercontent.com/u/3861236/iHackintosh%20Nano%20SIM.pdf

This is a template I printed on an A4 paper at 100%. I put my MiniSim on there, taped it using scotch tape and drew the corresponding lines with a permanent pen. I then used a cutter and finished the job using a pair of scissors. Et voilà : a NanoSIM homemade ! I could then activate my new phone without having to wait for the new SIM to arrive (and saved a little in the process).